As a Taxomate accounting partner, your Partner Dashboard is your central hub for managing client accounts. From here, you can view client statuses, add new clients, complete pending setups, and access account settings.
This article walks you through the core actions available in the dashboard.
To access the dashboard, log into your Taxomate account and select Dashboard from the top navigation bar.
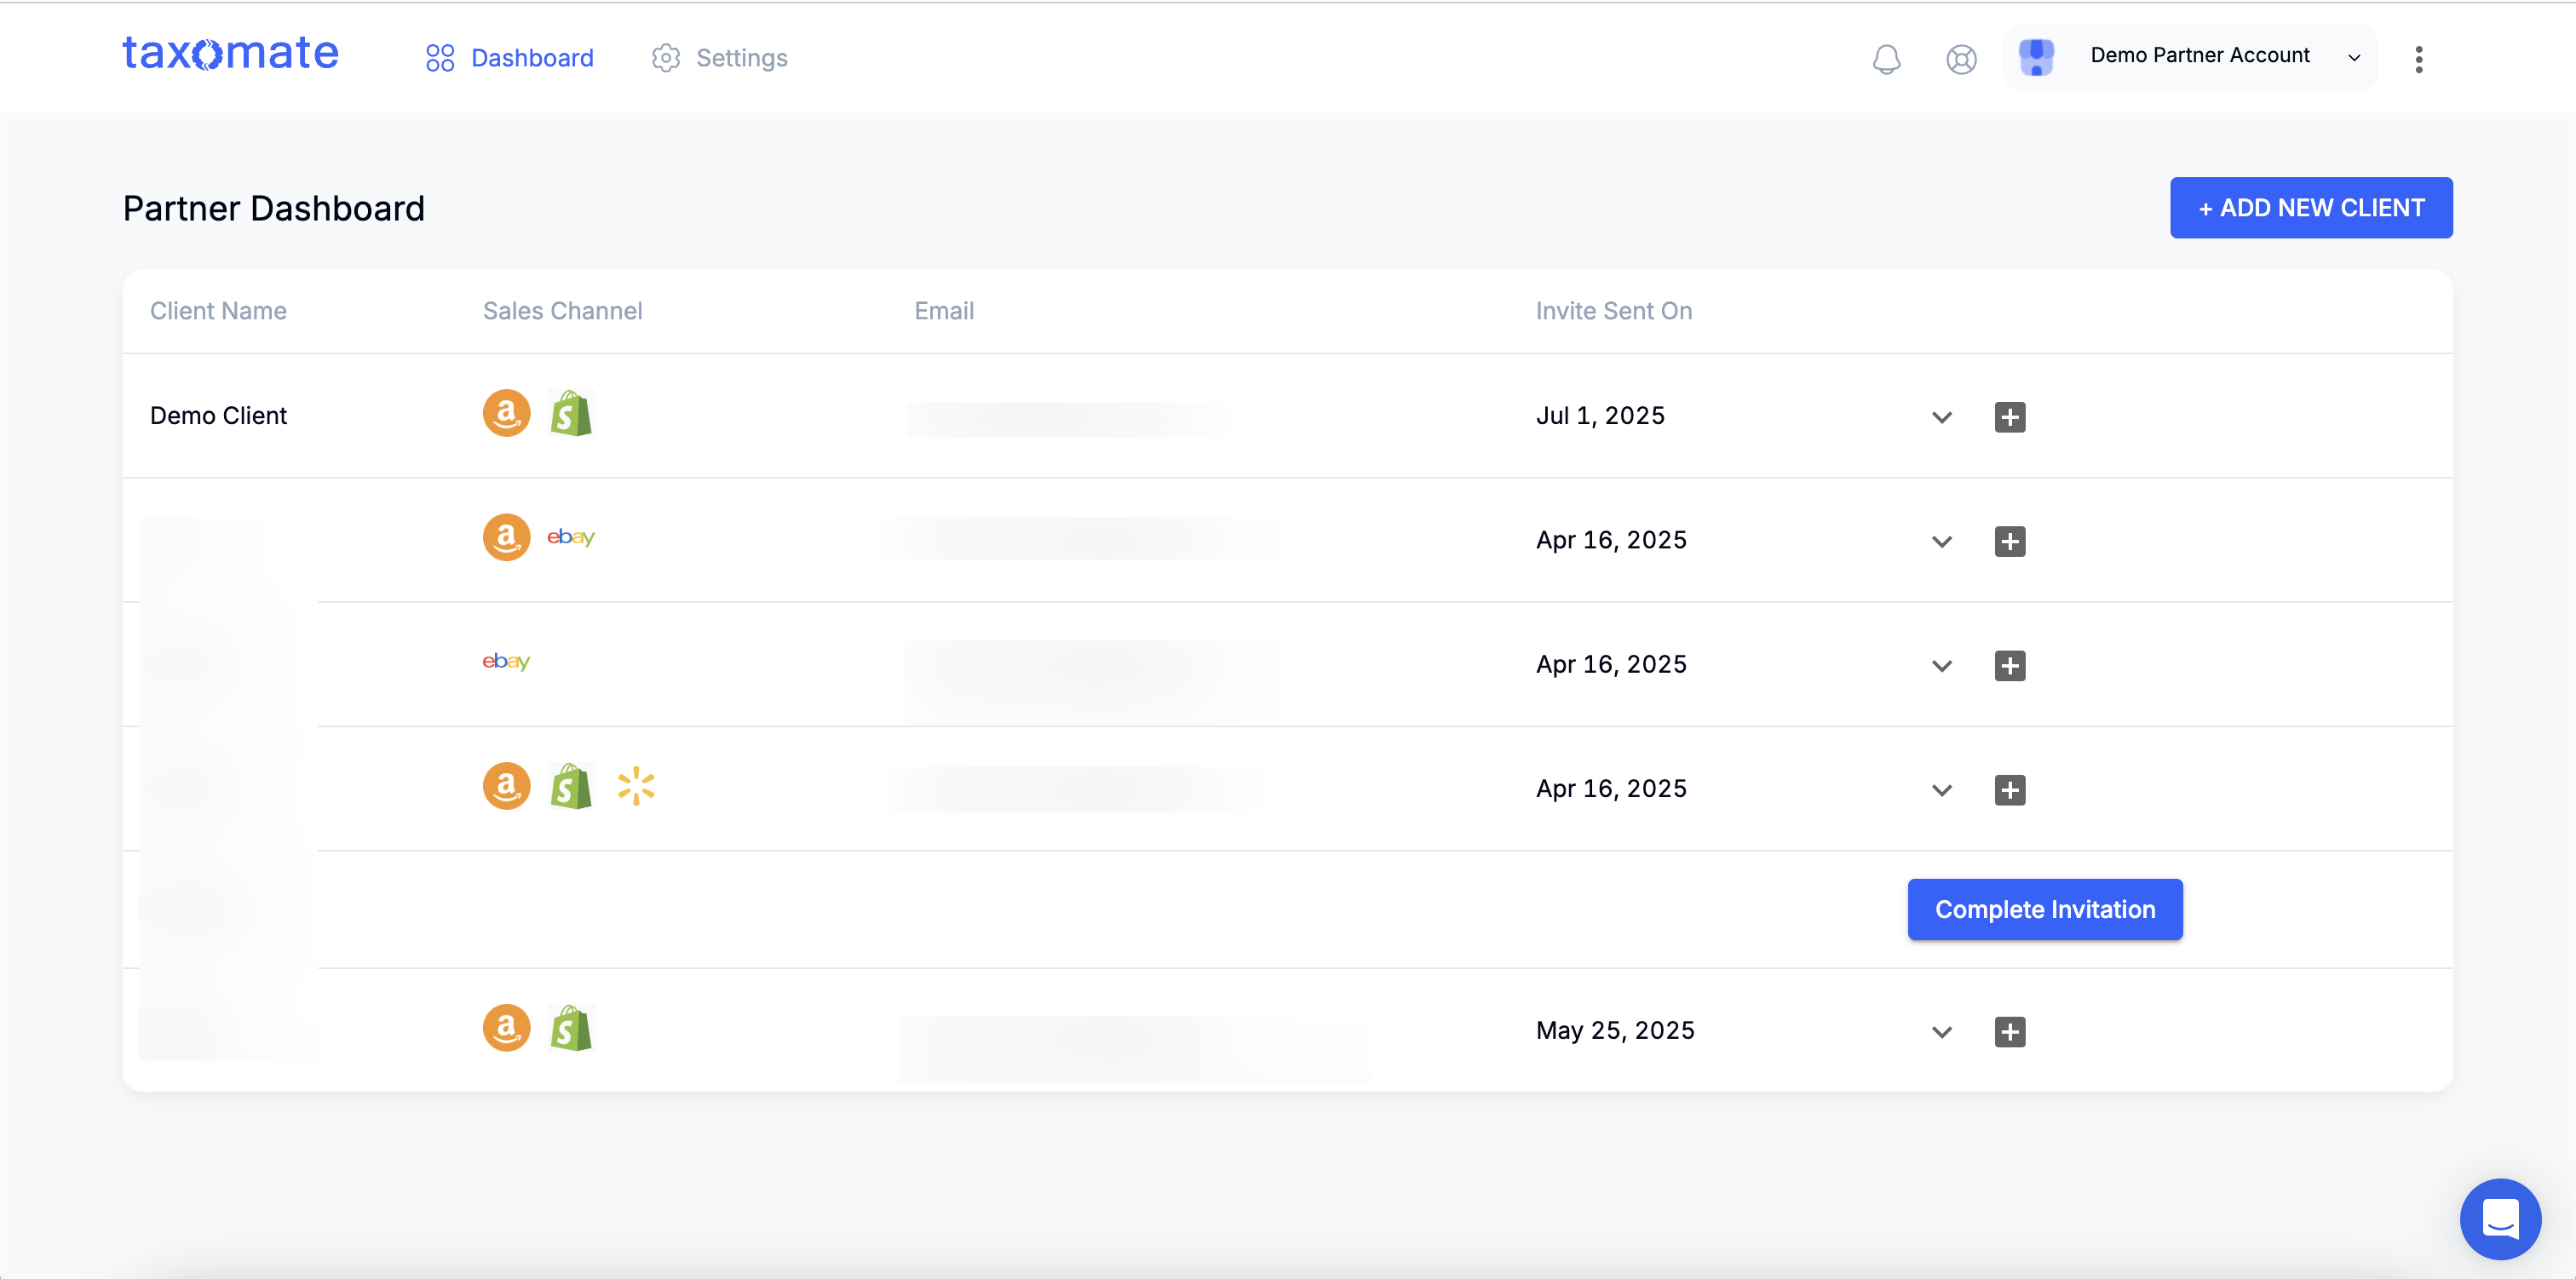
Each row in your dashboard represents a client account and includes the following:
Column | Description |
Client Name | The business name you assigned during setup. |
Sales Channel | Icons showing connected or selected marketplaces (Amazon, Shopify, etc.). |
The client’s email address used during the invite. | |
Invite Sent On | The date the client invitation was emailed. |
Actions | Expand to complete setup, resend invites, or manage access. |
To view or manage a specific marketplace account (e.g., Amazon or Shopify), click the arrow to expand the client row, then click the appropriate account button.


You’ll see all connected marketplaces for that client. Click the account name to access their environment in a new tab.
Each marketplace environment operates like a standalone Taxomate account, so you can:
Review imported settlements
Update mappings
Send data to Xero, QuickBooks, or Wave
Modify tax settings
Troubleshoot issues
To create a new client account:
Click + Add New Client
Complete the 6-step setup:
Client Name
Sales Channels
Subscription Payment
Select Plan
Connect Accounting Software
Invite Client
See full guide → How to Add a Client Account
If a client hasn’t finished setup (e.g., hasn’t connected their sales channels or bookkeeping software), you’ll see a “Complete Invitation” button.
Clicking this lets you:
View the client’s current progress
Resend their invite if needed
Walk them through the remaining steps manually (e.g., marketplace connection)
To resend an invite, click the dropdown next to the client row and select Resend Invitation.
To revoke access or delete a client (only if not yet connected), use Remove Client from the dropdown.
You can return to the dashboard at any time to track client setup status.
Once the client completes their setup, you’ll receive a notification to proceed with account and tax mapping.
Click the chat icon in the bottom right or email [email protected] for assistance.
