1️⃣ Access QuickBooks Apps:
Log in to your QuickBooks Online account.
Navigate to the "Apps" section.
2️⃣ Find PayPal App:
Search for "PayPal" in the App Store.
Select "PayPal Connector" by QuickBooks.
3️⃣ Install and Authorize:
Click "Get App Now" and follow the prompts to install.
Authorize the connection by logging into your PayPal account when prompted.
1️⃣ Set Up a Clearing Account in QuickBooks:
Go to "Accounting" > "Chart of Accounts."
Click "New" to create a new account.
Choose "Bank" as the account type.
Name the account "PayPal Clearing Account" (or a preferred name).
2️⃣ Map PayPal Transactions in Taxomate:
Log in to Taxomate.
Navigate to the "Account & Taxes" page.
Locate the "Gateway Transactions" category.
Map PayPal transactions to the PayPal Clearing Account you created.
1️⃣ Access Bank Rules:
In QuickBooks Online, go to "Banking."
Select "Rules."
2️⃣ Create a New Rule:
Click "New Rule."
Name it "PayPal Sales to Clearing."
Set the rule to apply to "Money In" transactions.
Choose the PayPal bank account to apply the rule.
3️⃣ Set Conditions:
Under "Conditions," specify that "Bank Text" contains "PayPal" to capture relevant transactions.
4️⃣ Define Actions:
Set "Transaction Type" to "Deposit."
Assign the deposit to the "PayPal Clearing Account.
5️⃣ Save the Rule:
Ensure all details are correct.
✅ Save the rule to automate the categorization of future PayPal deposits.
Since PayPal Connect now separates fees automatically, you do not need to manually record fees via journal entries. Instead, create a bank rule just like for sales.
1️⃣ Create a New Rule for Fees:
Click "New Rule."
Name it "PayPal Fees to Expense."
Set the rule to apply to "Money Out" transactions.
Choose the PayPal bank account to apply the rule.
2️⃣ Set Conditions:
Under "Conditions," specify that "Bank Text" contains "PayPal Fee" to capture fee transactions.
3️⃣ Define Actions:
Set "Transaction Type" to "Expense."
Assign the transaction to the "PayPal Fees" expense account (create an expense account if you have not already created it).
4️⃣ Save the Rule:
Ensure all details are correct.
Save the rule to automate PayPal fee categorization.
taxomate sends PayPal payouts that include an amount allocated to the Gateway Clearing account. This amount will not include any PayPal Fees since we are unable to import this information from Shopify.
After you connect your PayPal bank account you will see that deposit amount is net of fees. These deposits will be allocated to the Gateway Clearing account. At the end of the each month you will need to create a journal entry to account for any PayPal fees.
STEP 1. Connect PayPal to QuickBooks
Make sure you have connected your PayPal account to QuickBooks Online. You can add PayPal as an app in your QuickBooks account here.
STEP 2. Allocate PayPal Payments to Clearing Account
When you send a PayPal payout from taxomate to QuickBooks, the deposit amount is allocated to the Shopify Clearing Account we during Quick Setup for external gateways. These total amounts will match the payments received for each order in your PayPal account.
In order to reconcile the payouts you will want to allocate any allocate any Shopify deposits in the PayPal account QuickBooks to the Shopify Clearing Account.
Note: Alternatively you can create your own clearing account in QuickBooks and map it to PayPal payments in the Account & Taxes page in taxomate (under Gateway Transactions transaction category).
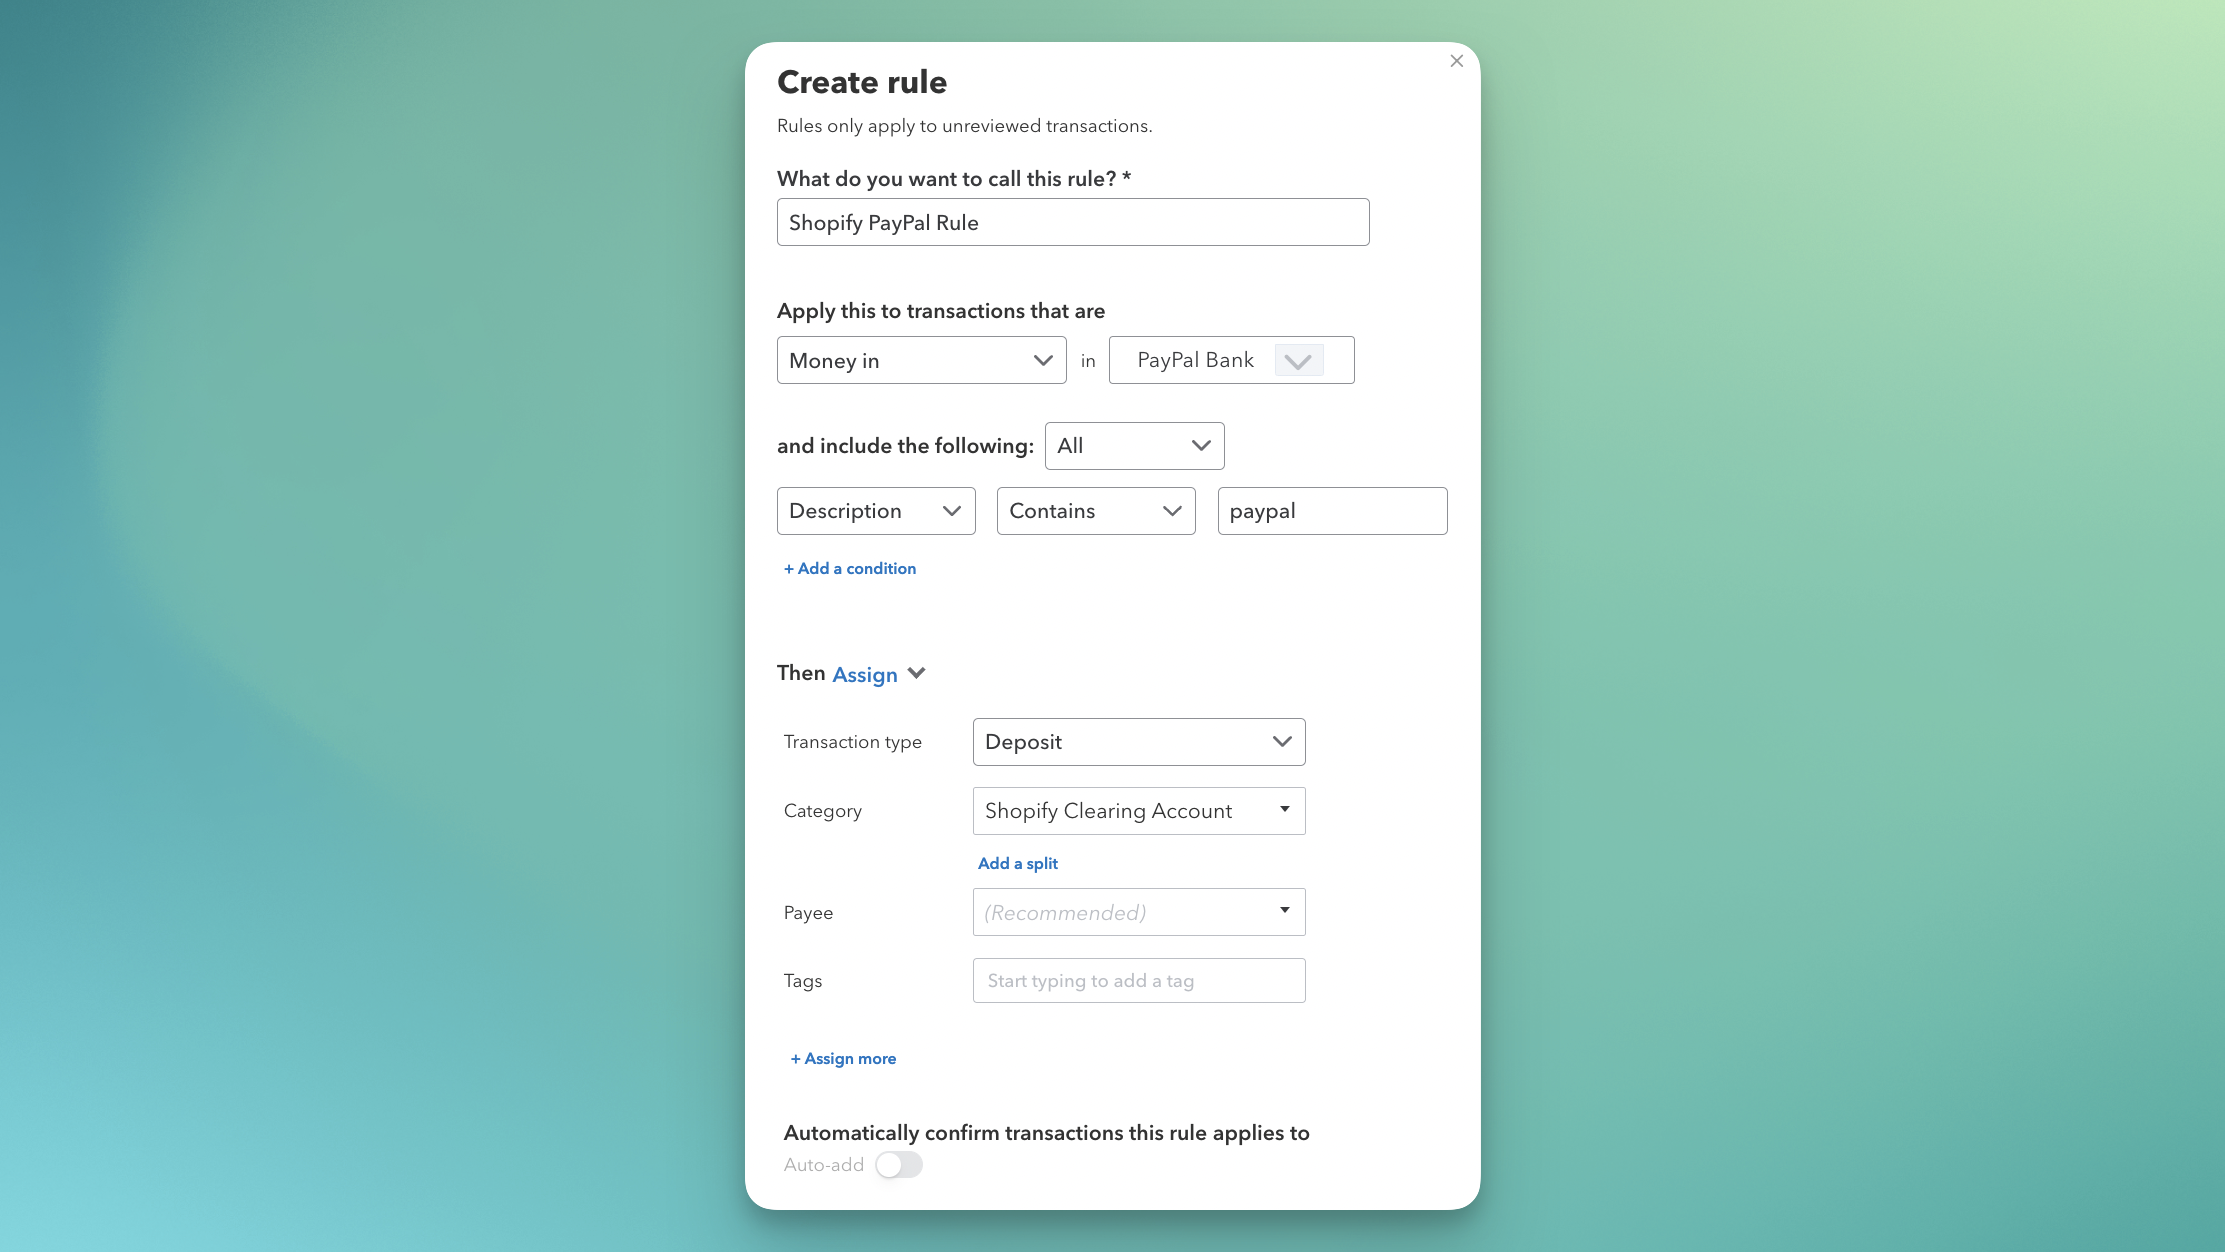
STEP 3. Create Bank Rule in QuickBooks
We recommend setting a bank rule in QuickBooks that would automatically categorized any payments received in PayPal to the Shopify Clearing Account. You would then approve any deposits applicable to Shopify.
See the rule we created below as an example:
STEP 4. Run Monthly Report in PayPal for PayPal Fees
Since the payout data we receive from Shopify does not include paypal fees you will need to enter any PayPal fees on a monthly basis.
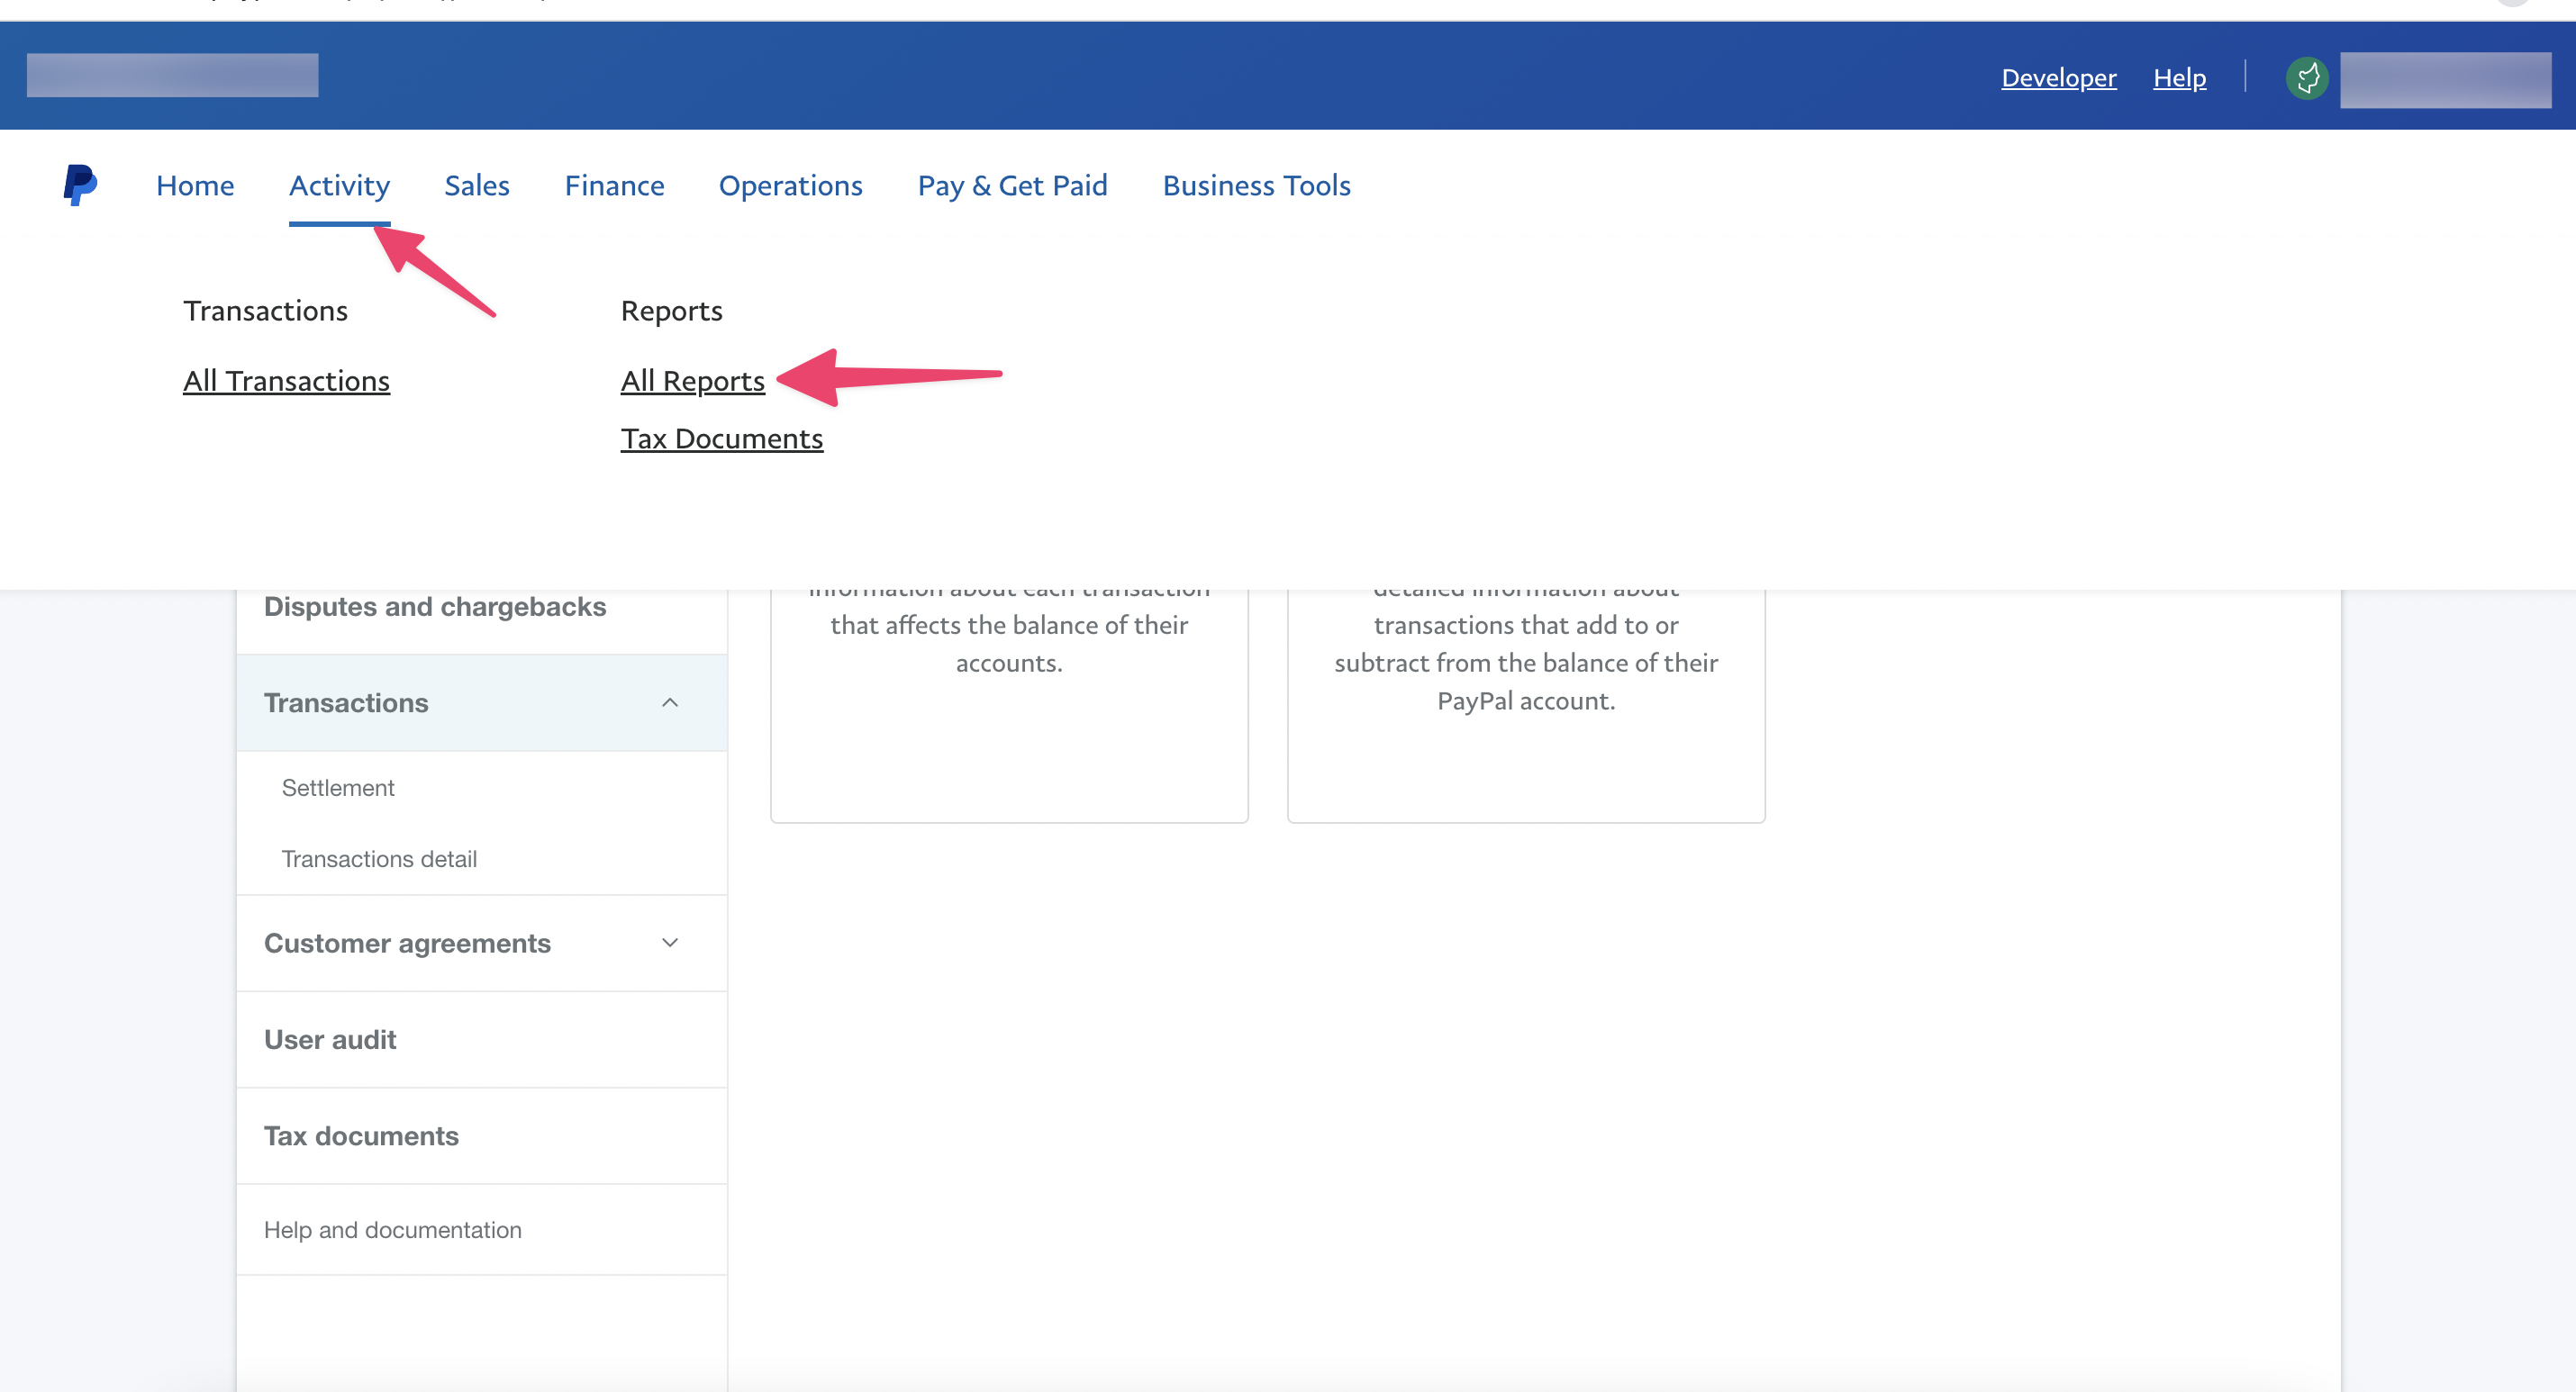
First, go to Activity > All Reports and then select Activity Download.
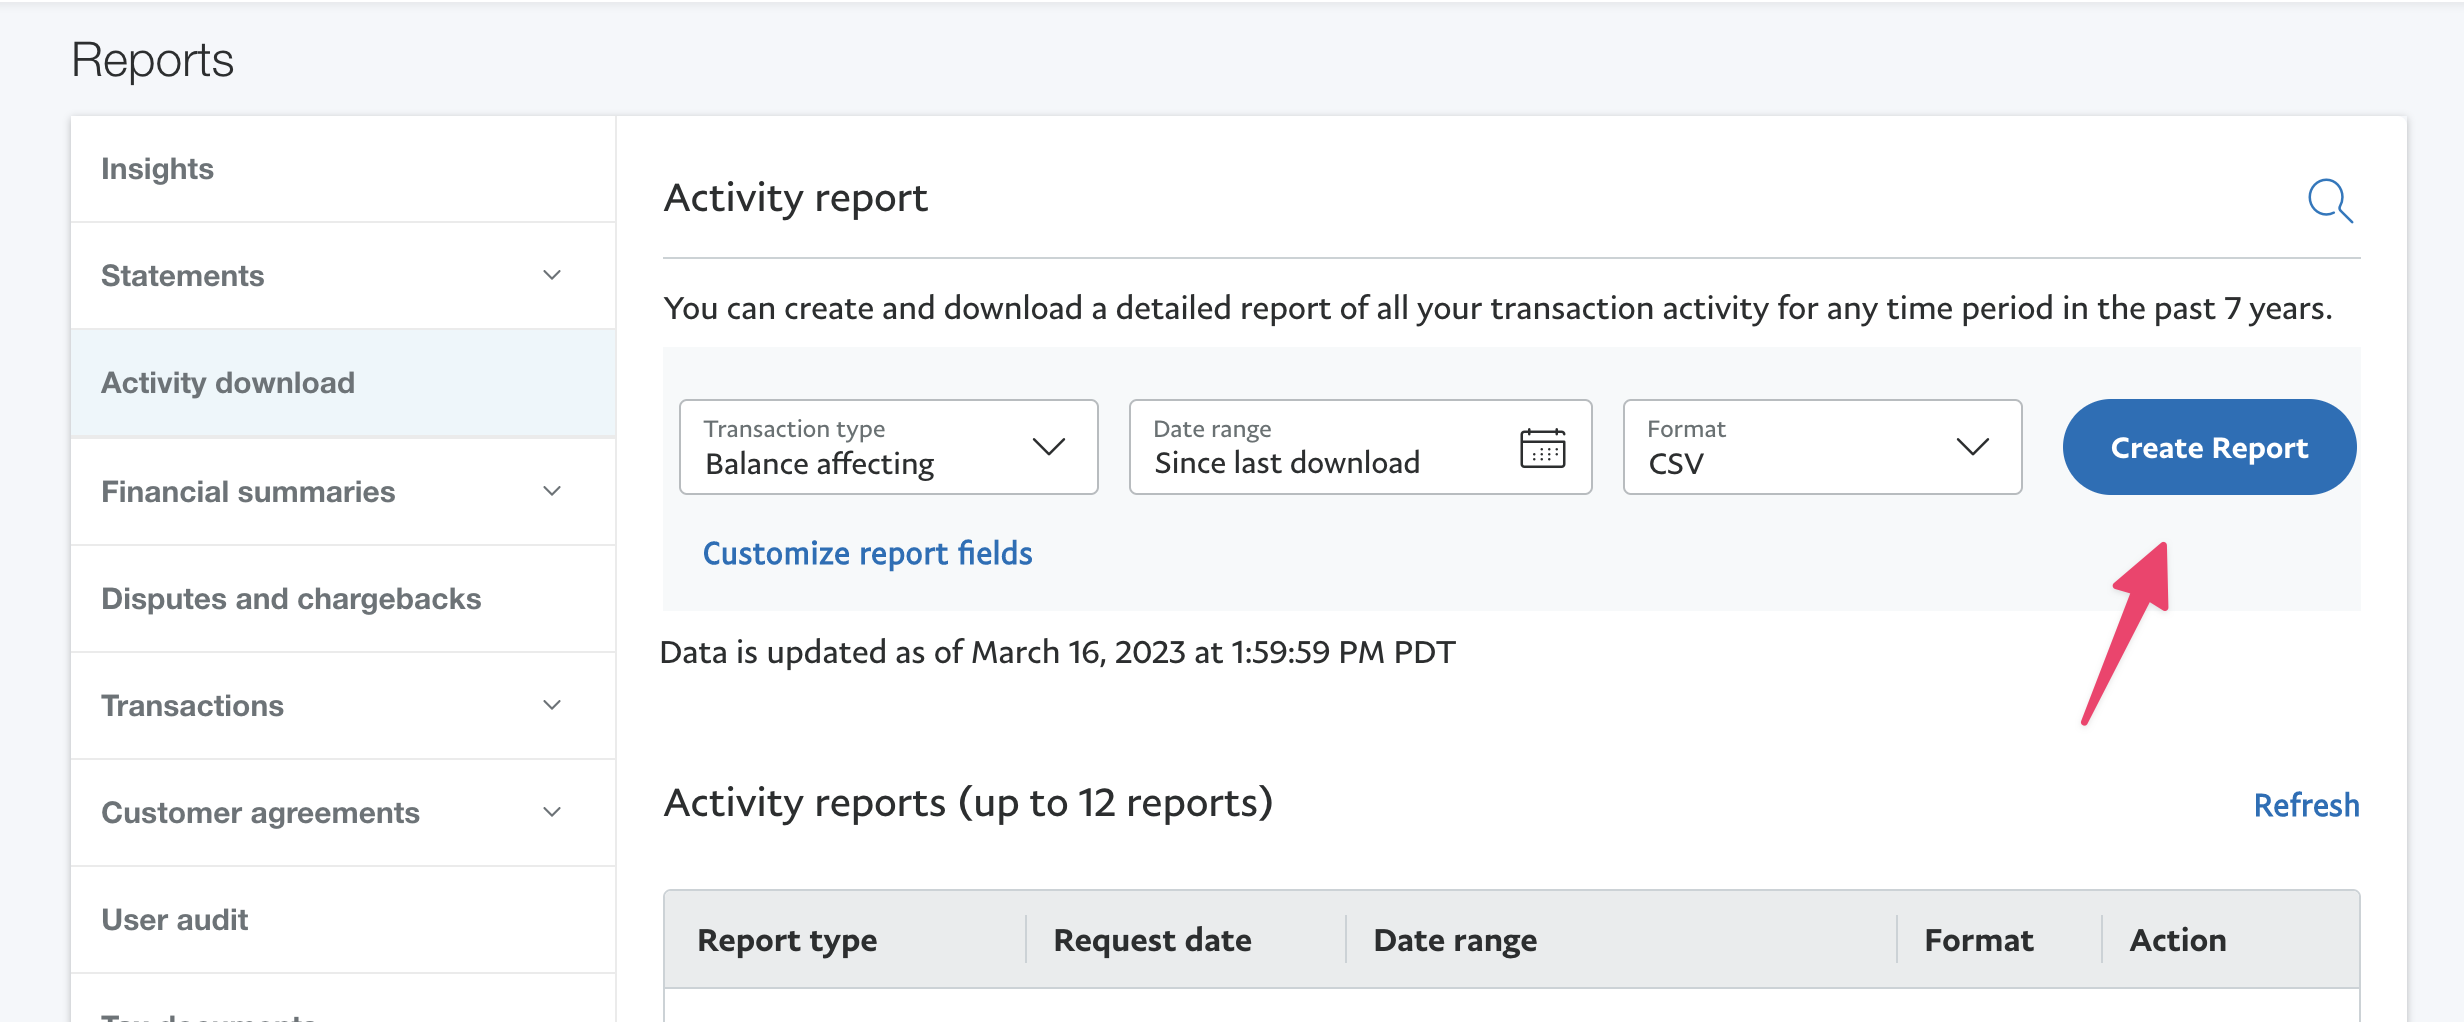
Select the particular month / date range and then Create Report. Download the report when it is ready.
After you download the report, calculate the total amount of PayPal fees you had for the month.
STEP 5: Allocate PayPal Fees using Journal Entry in QuickBooks
If you haven't already, create an expense account QuickBooks named PayPal Fees.
Create a journal entry and debit the PayPal Fees account and credit the Shopify Clearing account using the total amount of fees you calculated for the month.
