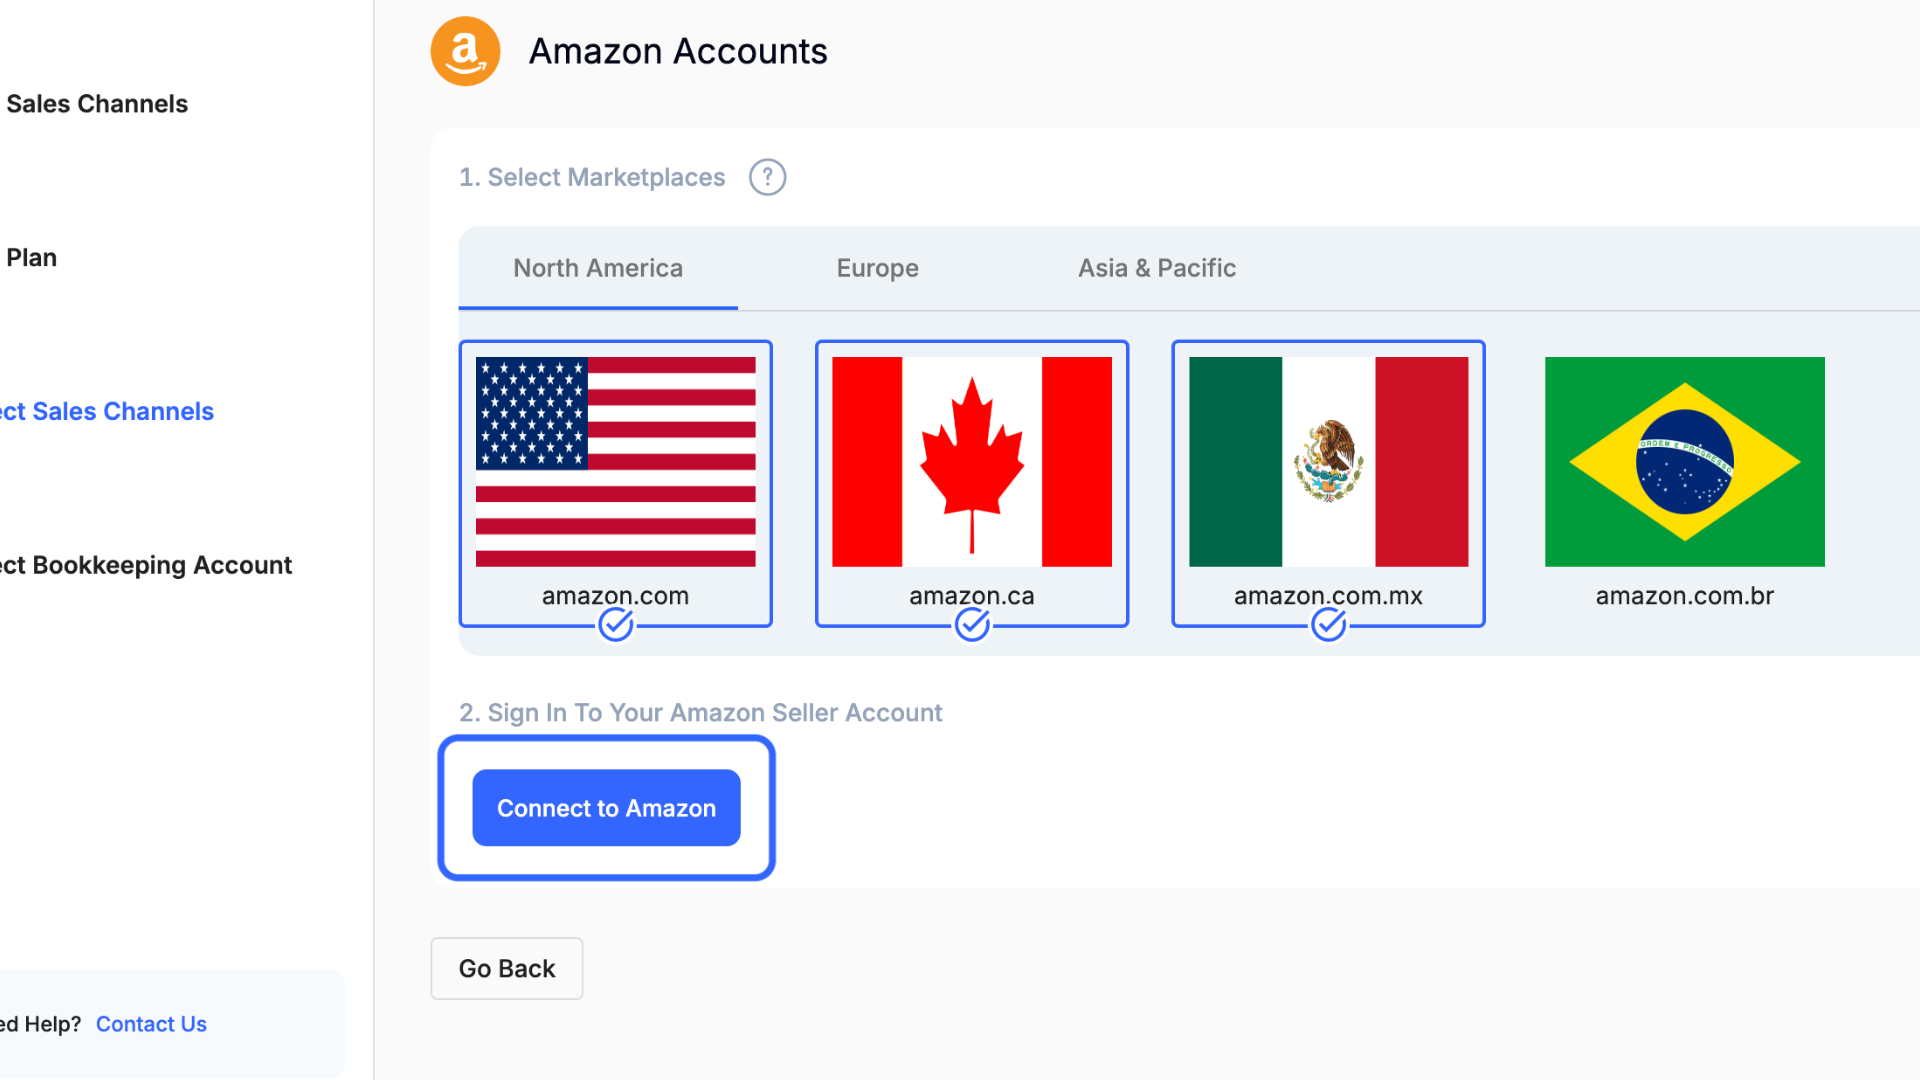
👉 Note: You can select multiple marketplaces in each region at the same time. For example, in the Europe region, you can select amazon.co.uk, amazon.de, amazon.fr, and amazon.it at the same time. You can always connect additional marketplaces after a quick setup is complete.

Once you've chosen your desired marketplaces, simply click Connect to Amazon.
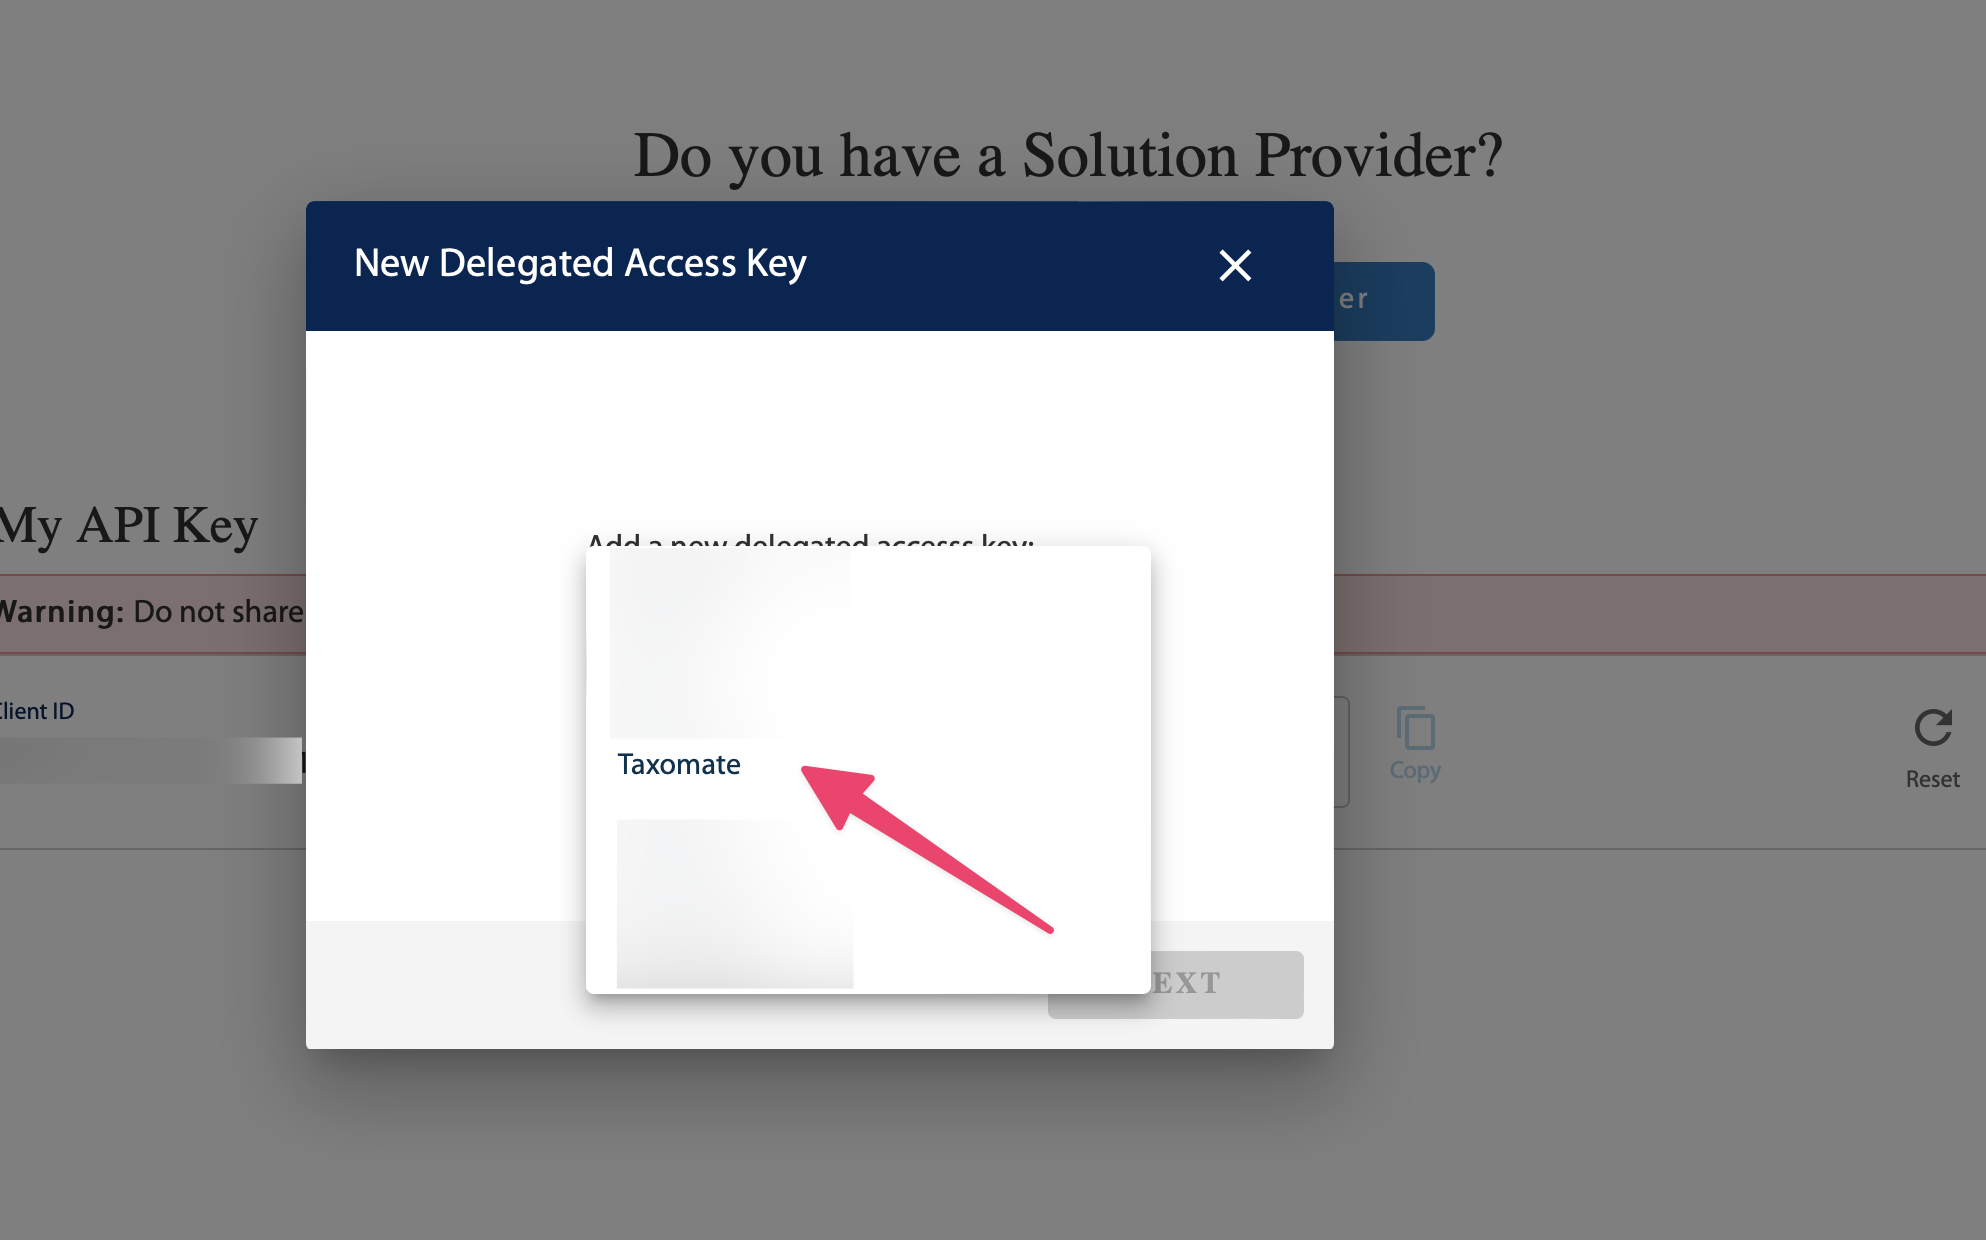
First click HERE to log in to the Walmart Developers Portal.
Click +Add New Key For a Solution Provider
👉 Make sure you are under the Production Keys tab.
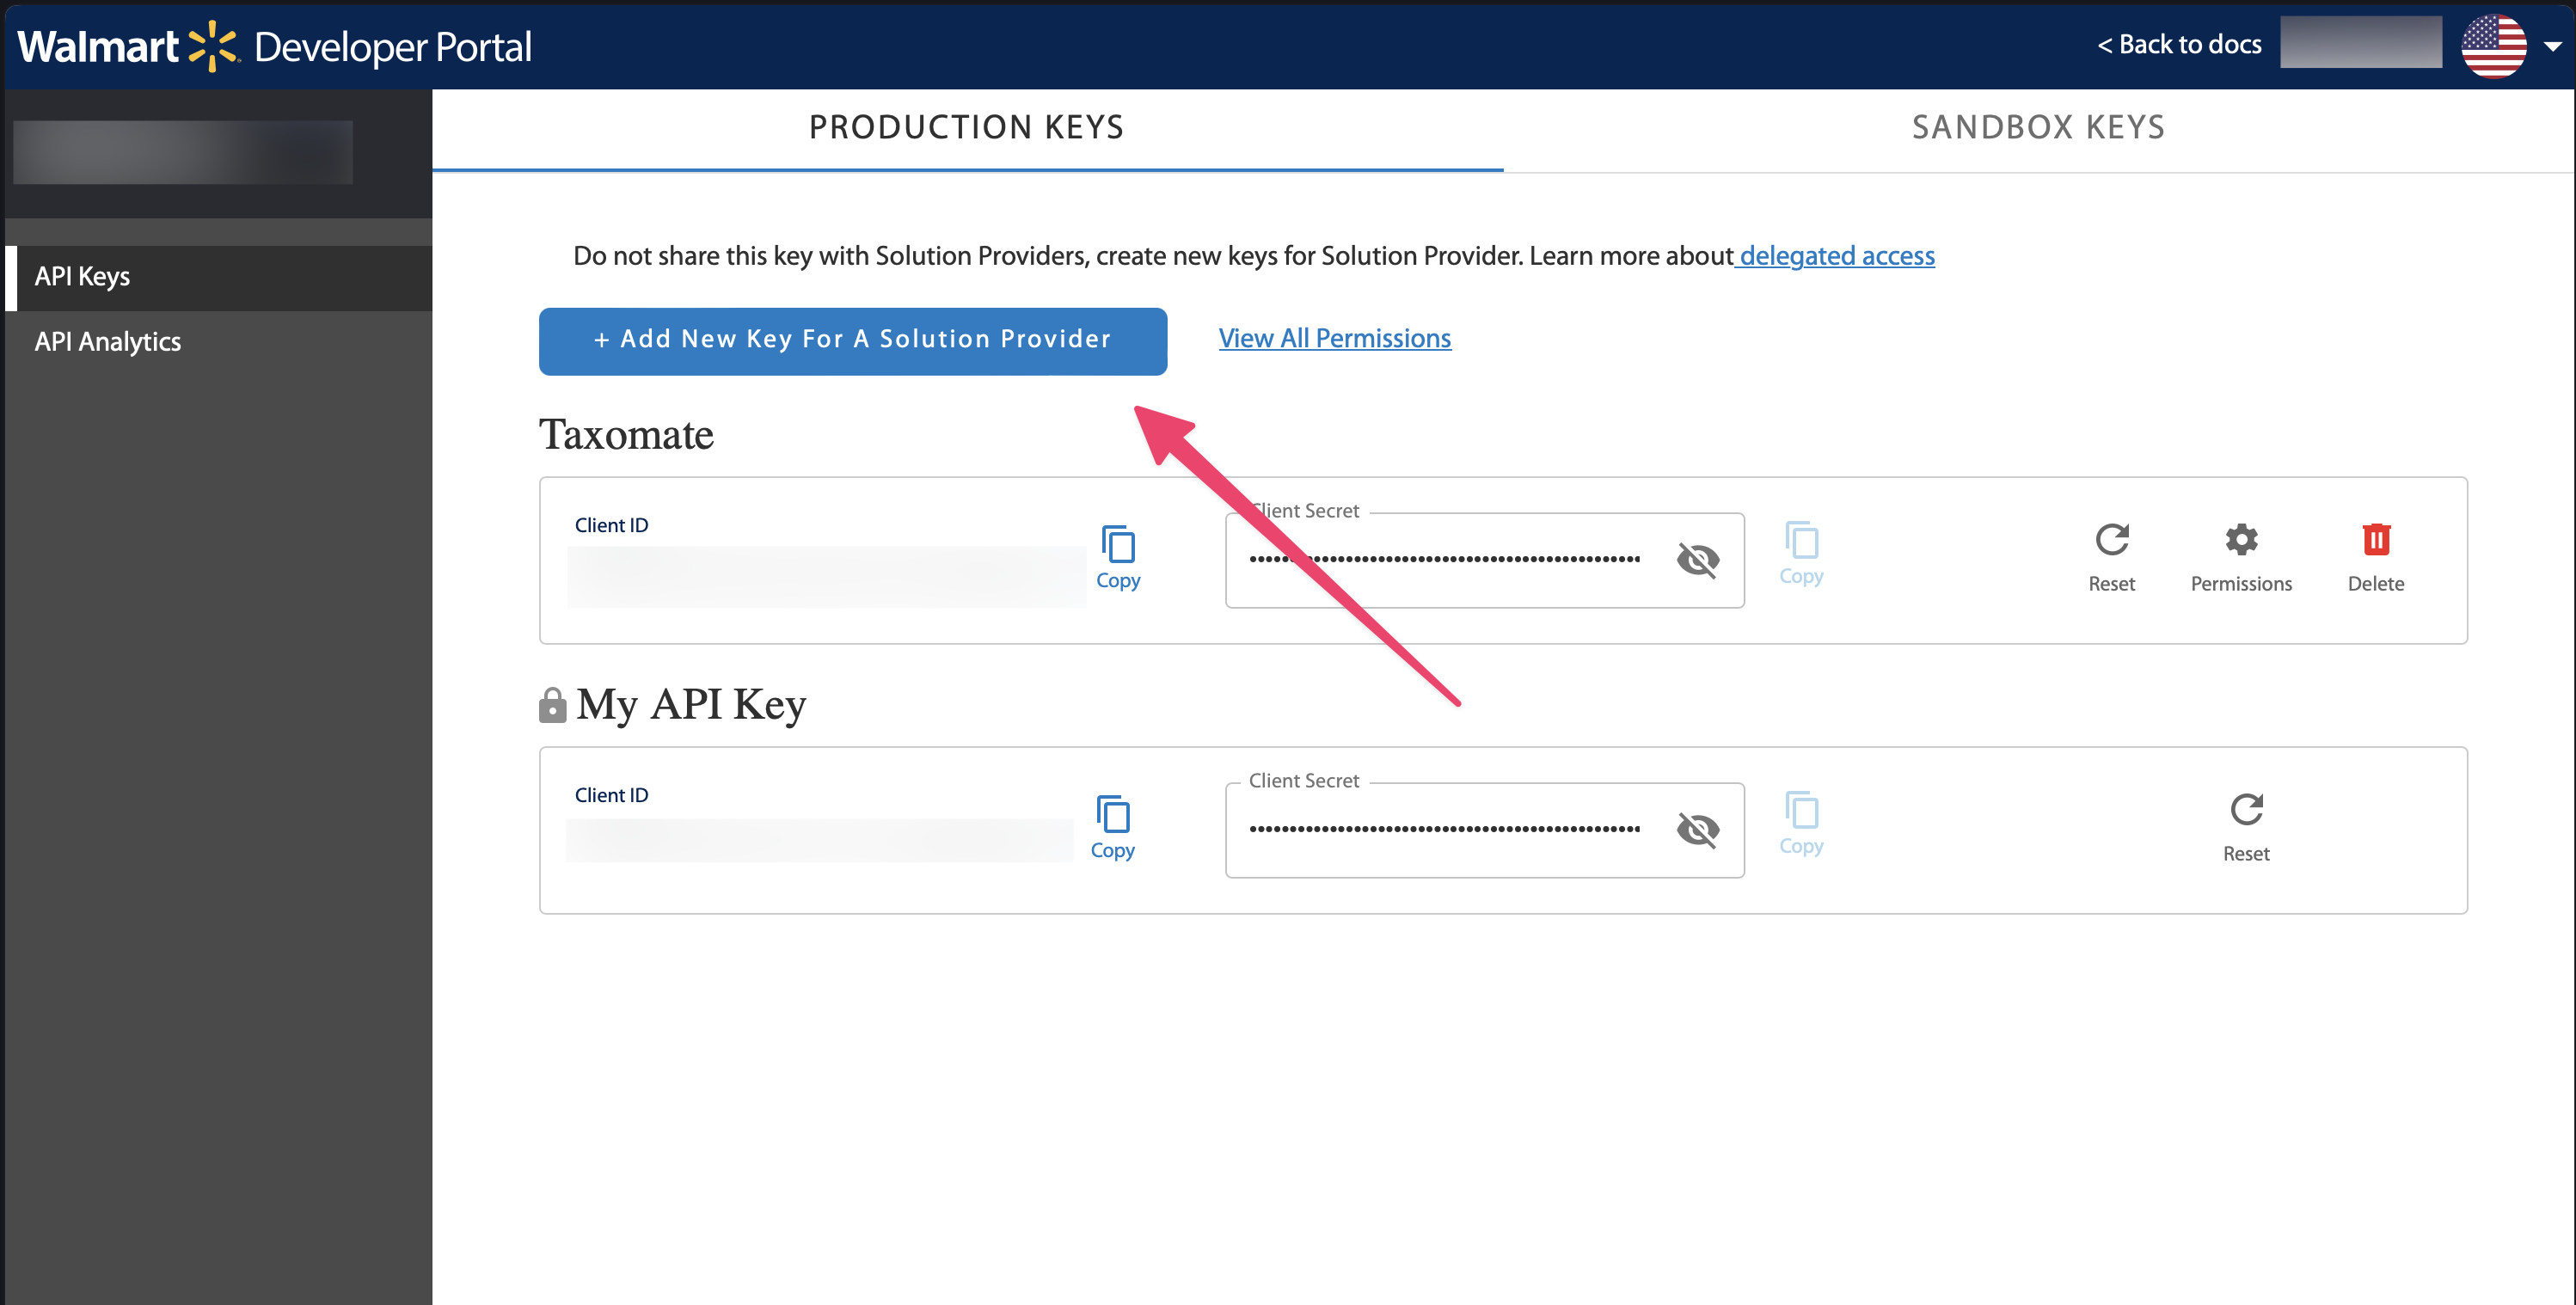
Under Add a new delegated access key, scroll down and select Taxomate.
Select ViewOnly permissions for Inventory, Reports, and Account Profile.
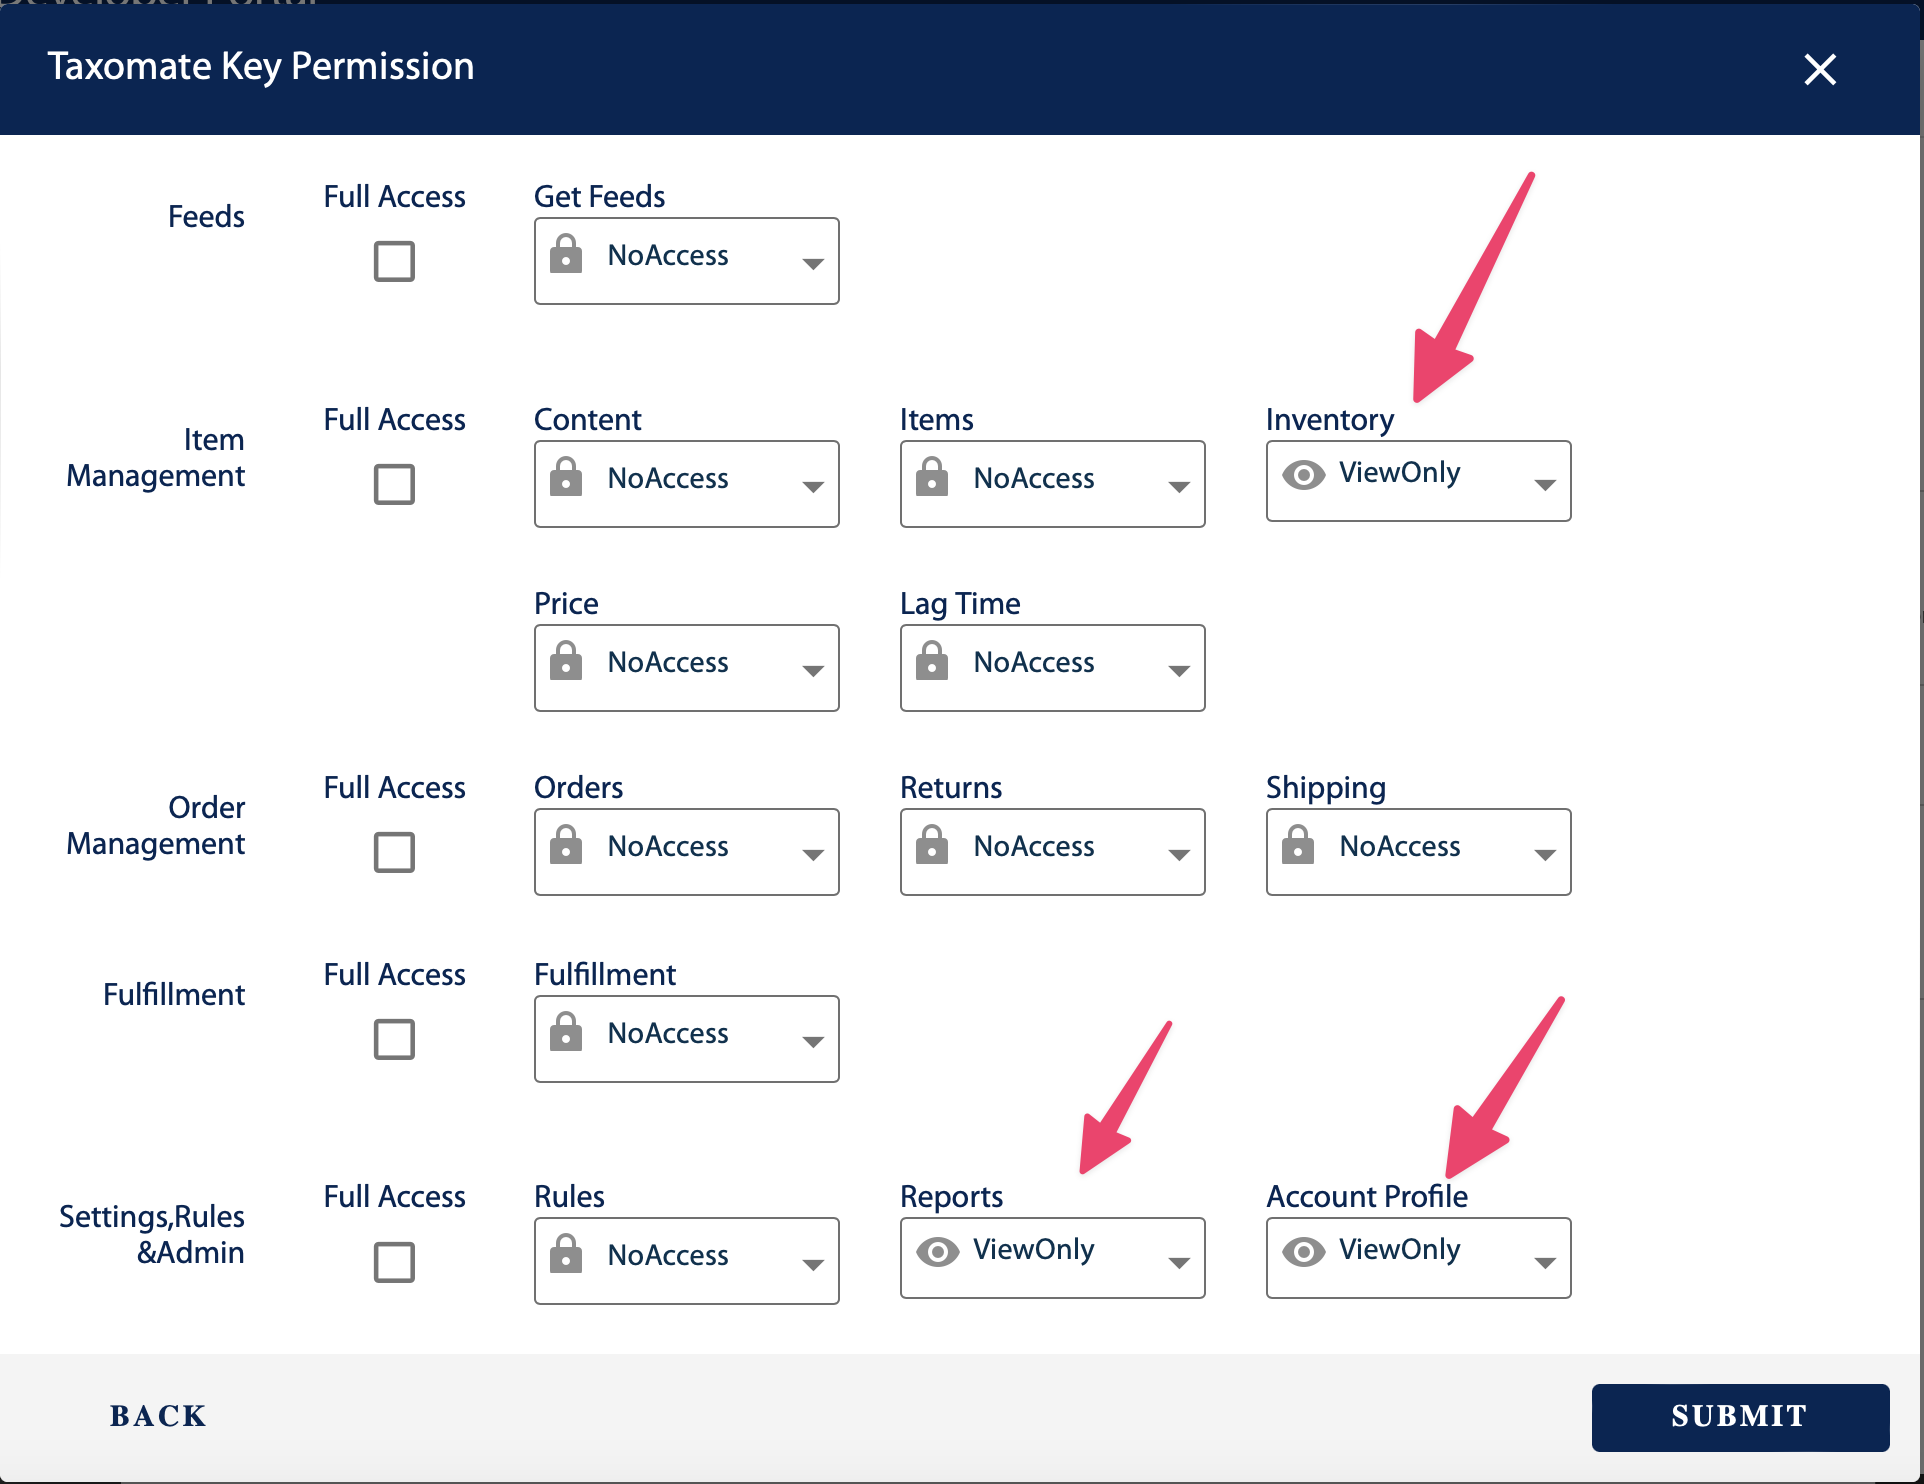
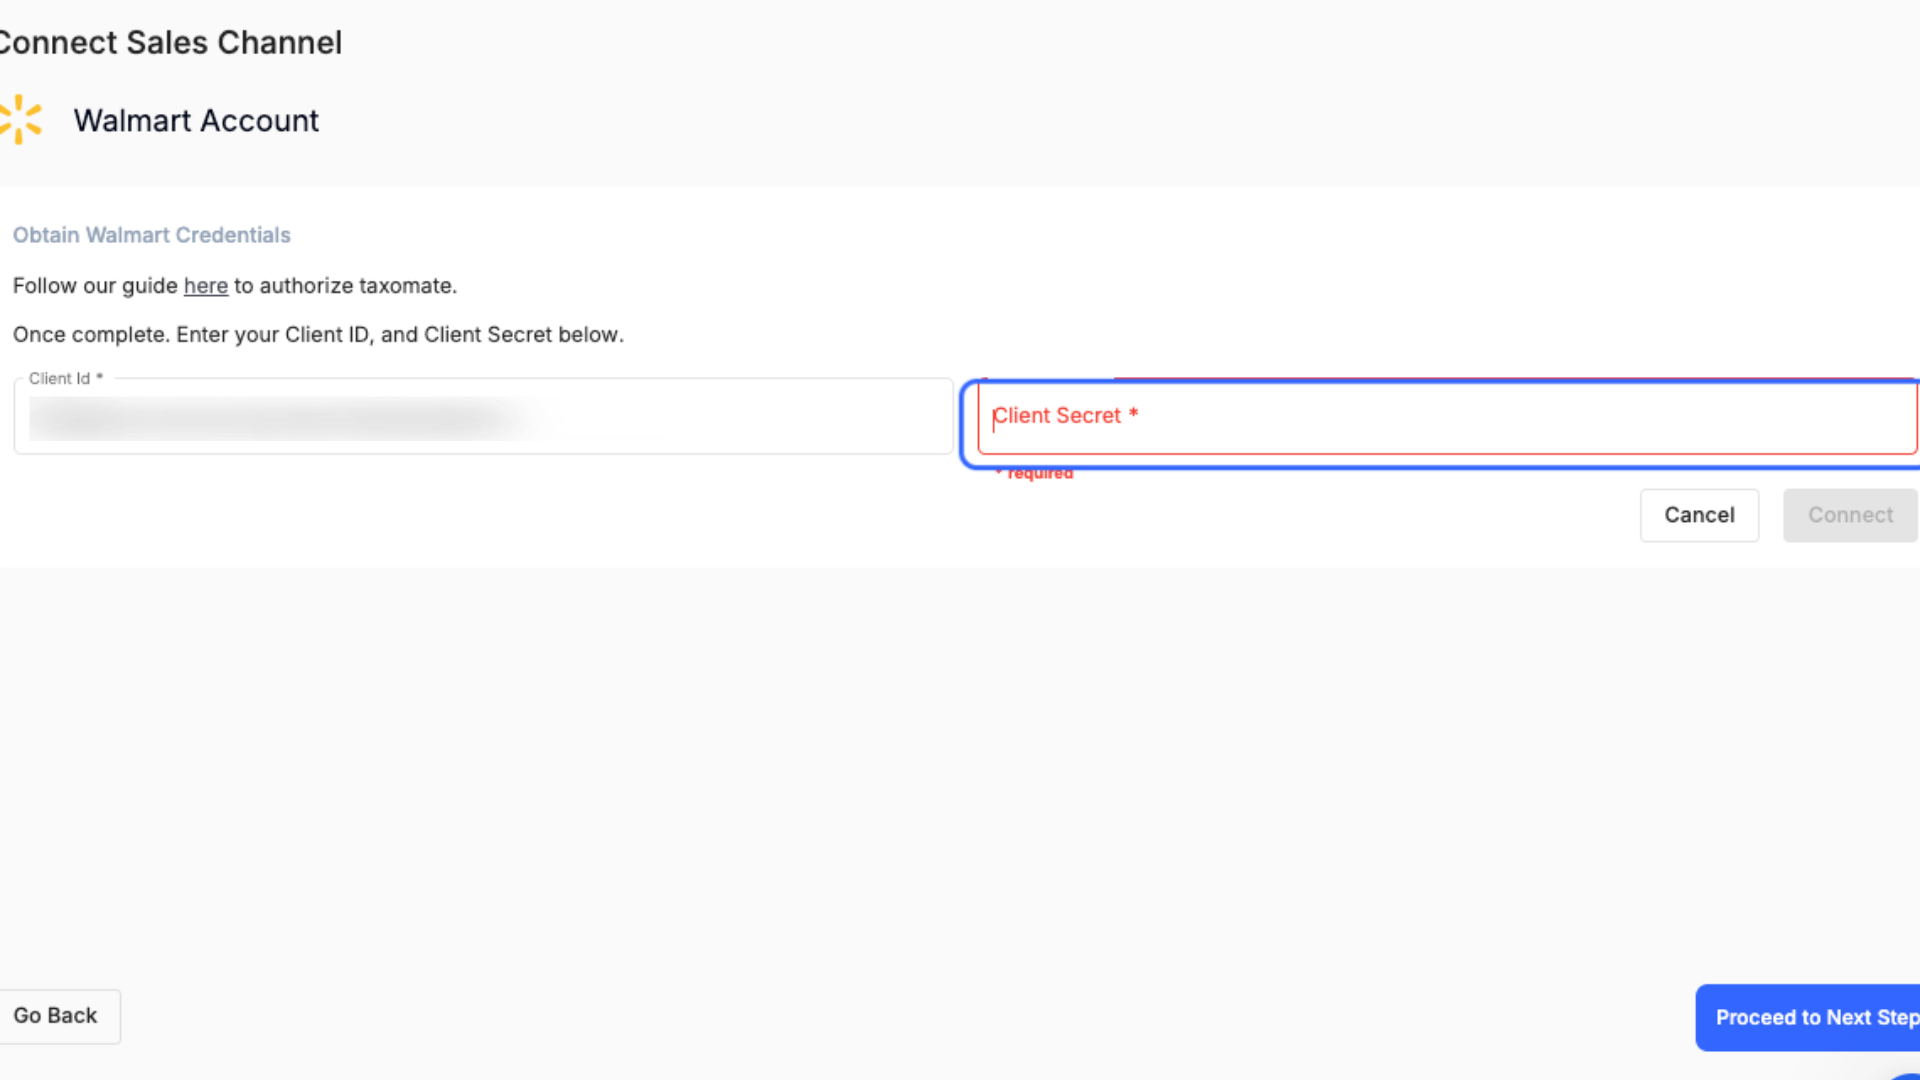
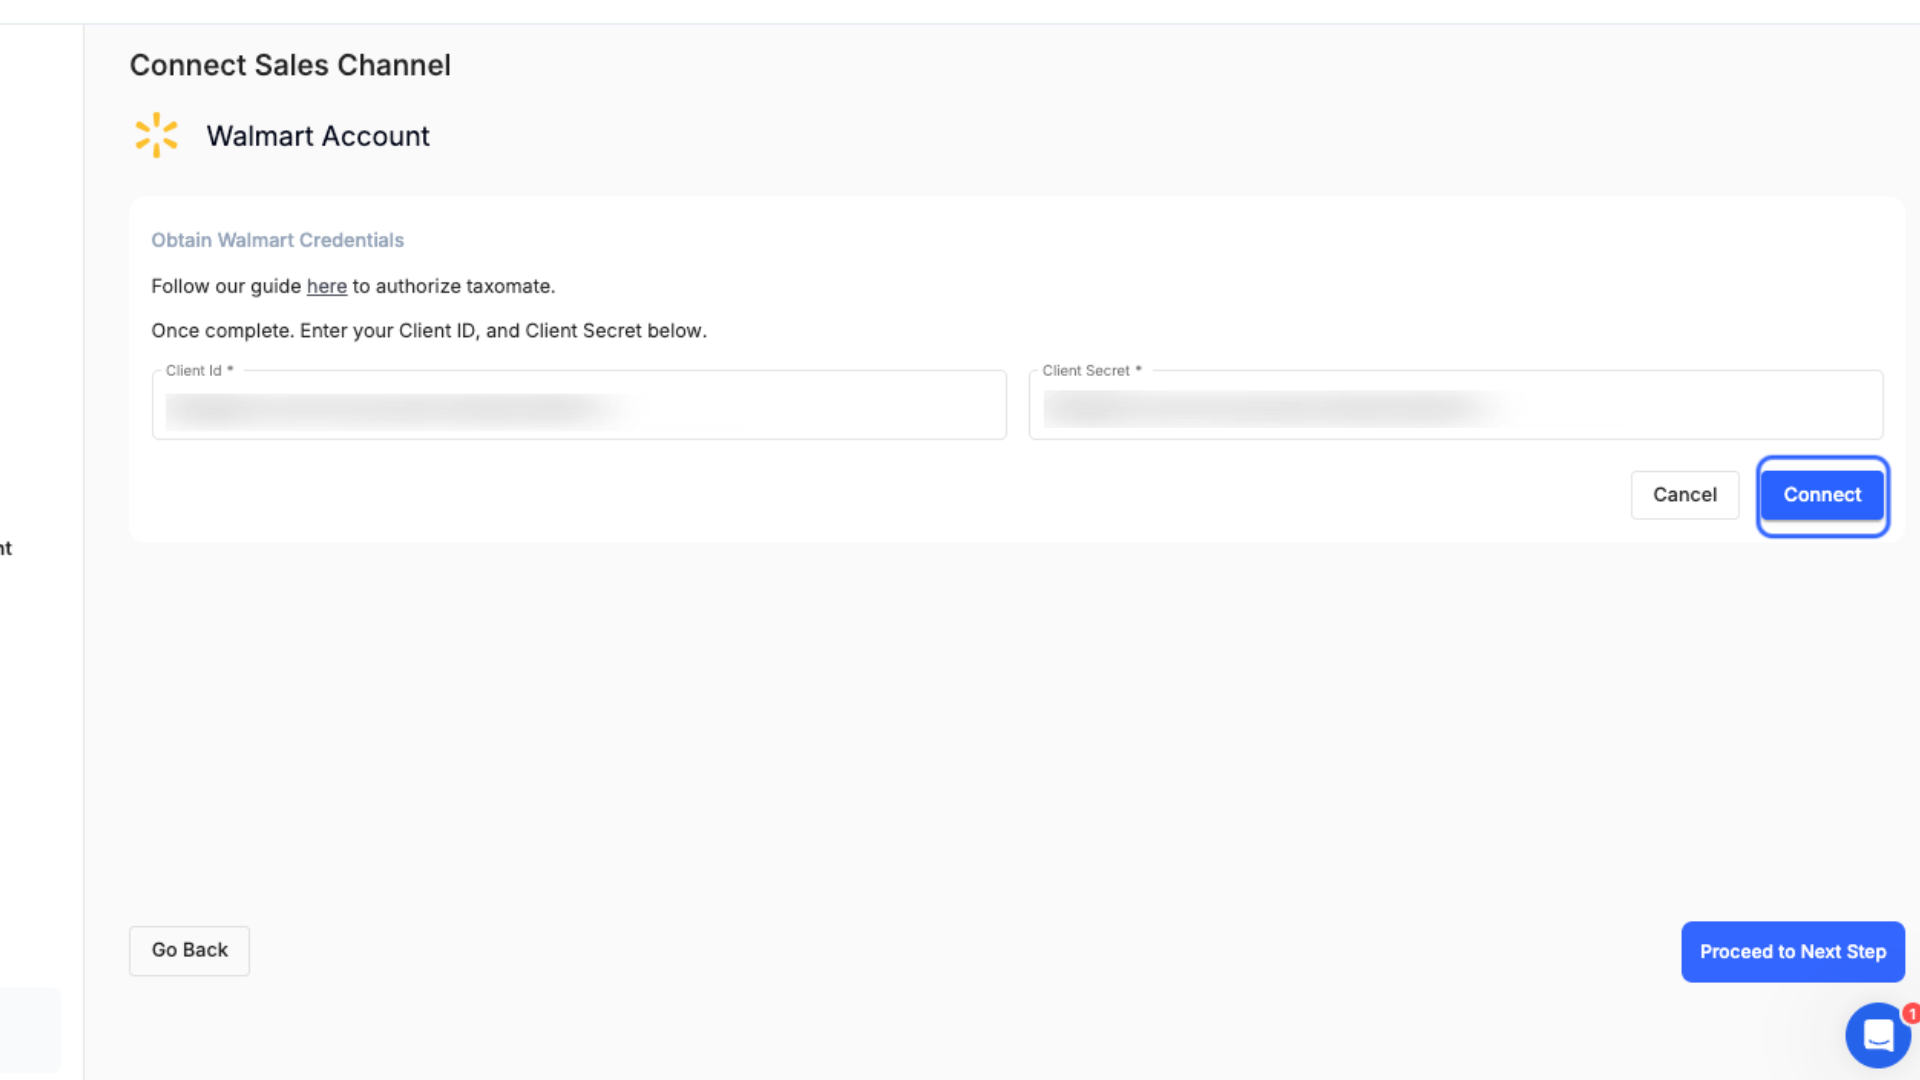
Copy down the Client ID and Client Secret to enter into Taxomate.

👉 Permissions may take a few minutes to register within Walmart. We recommend waiting at least 10 minutes before entering the Client ID and Secret into Taxomate.
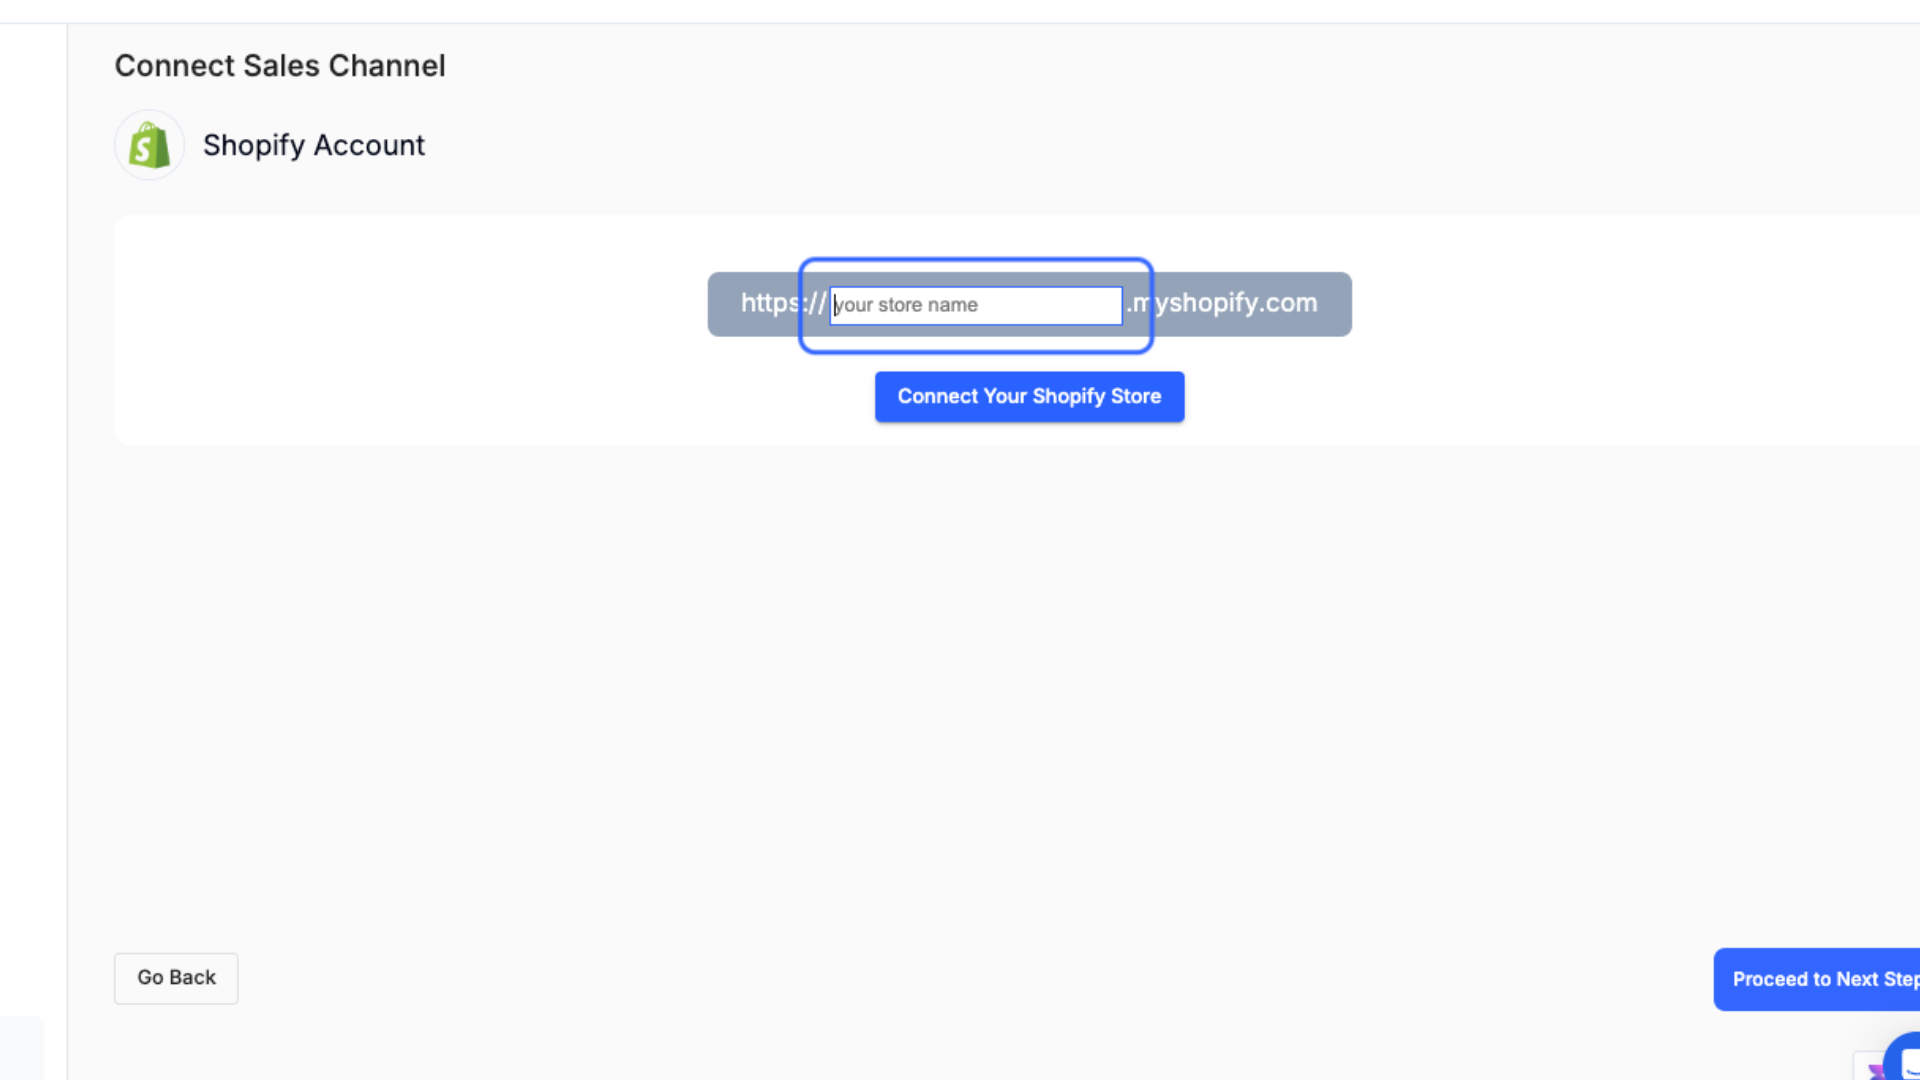
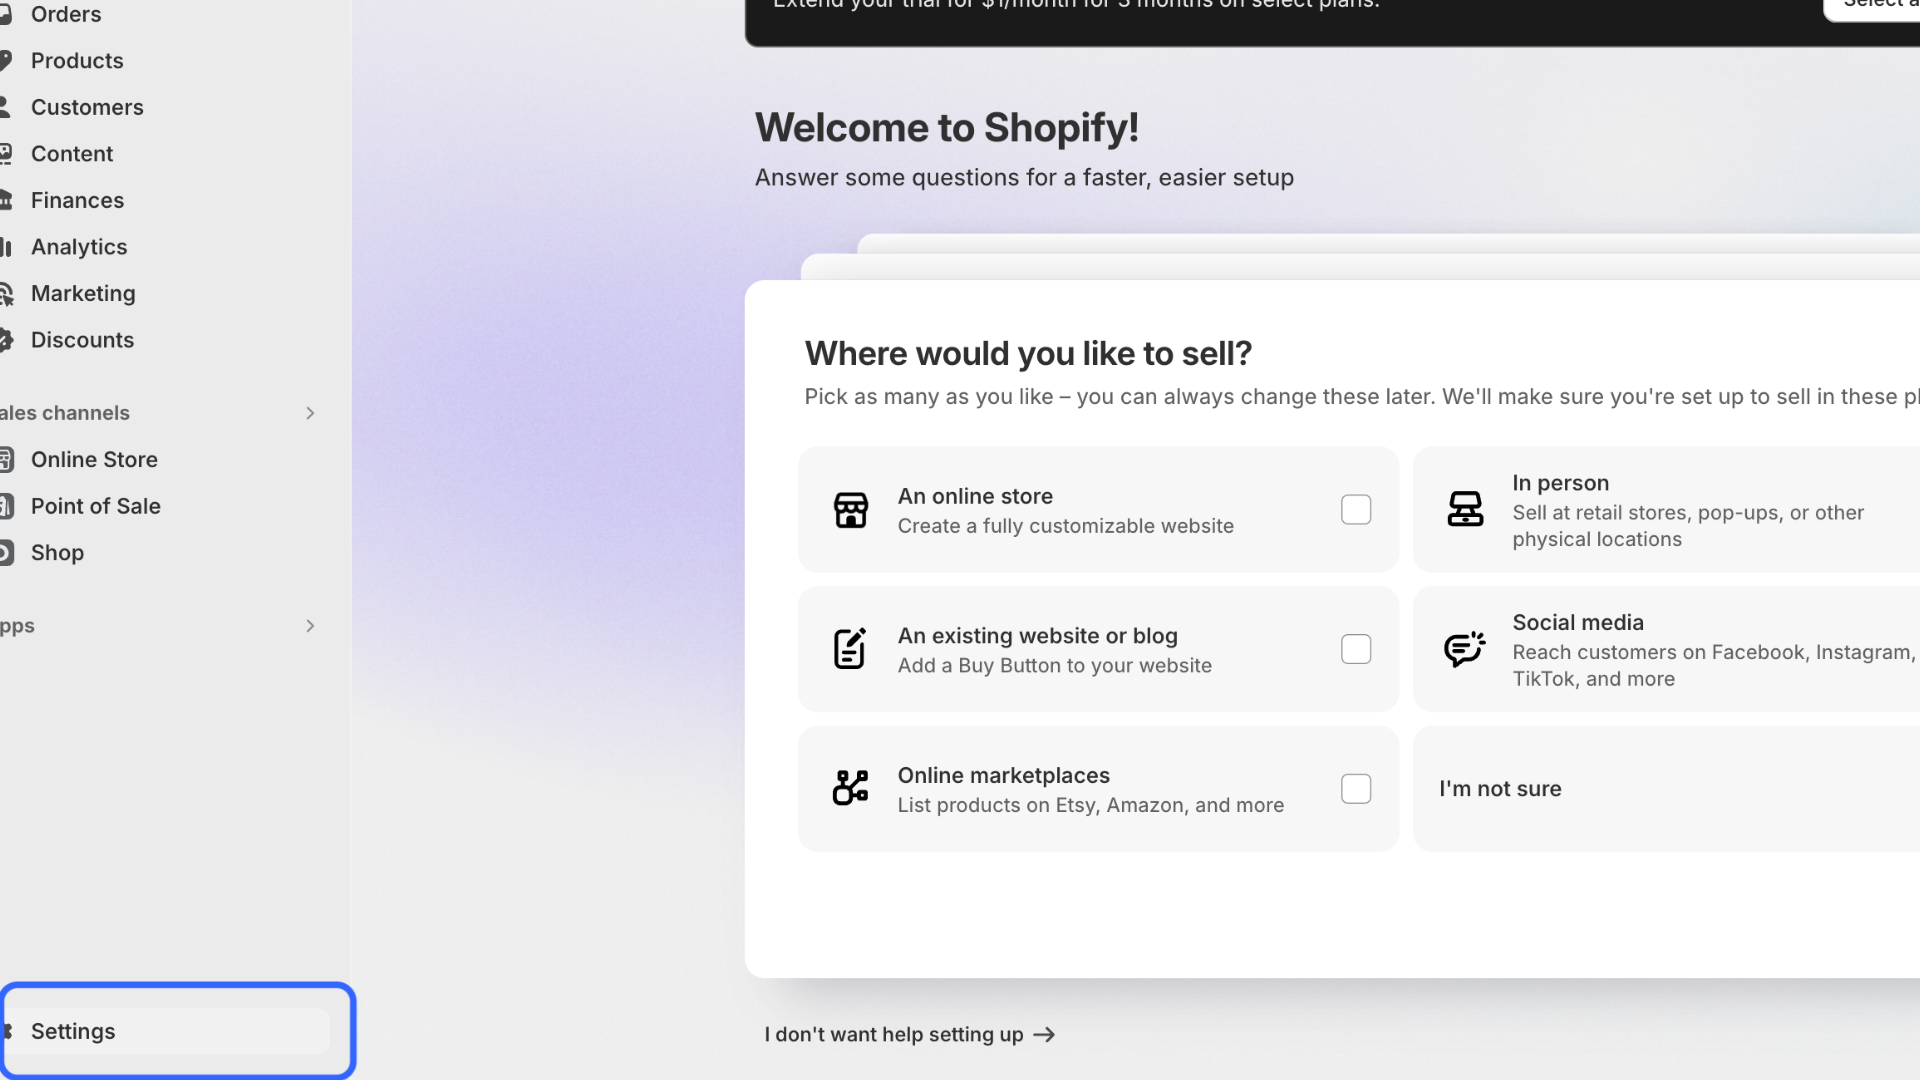
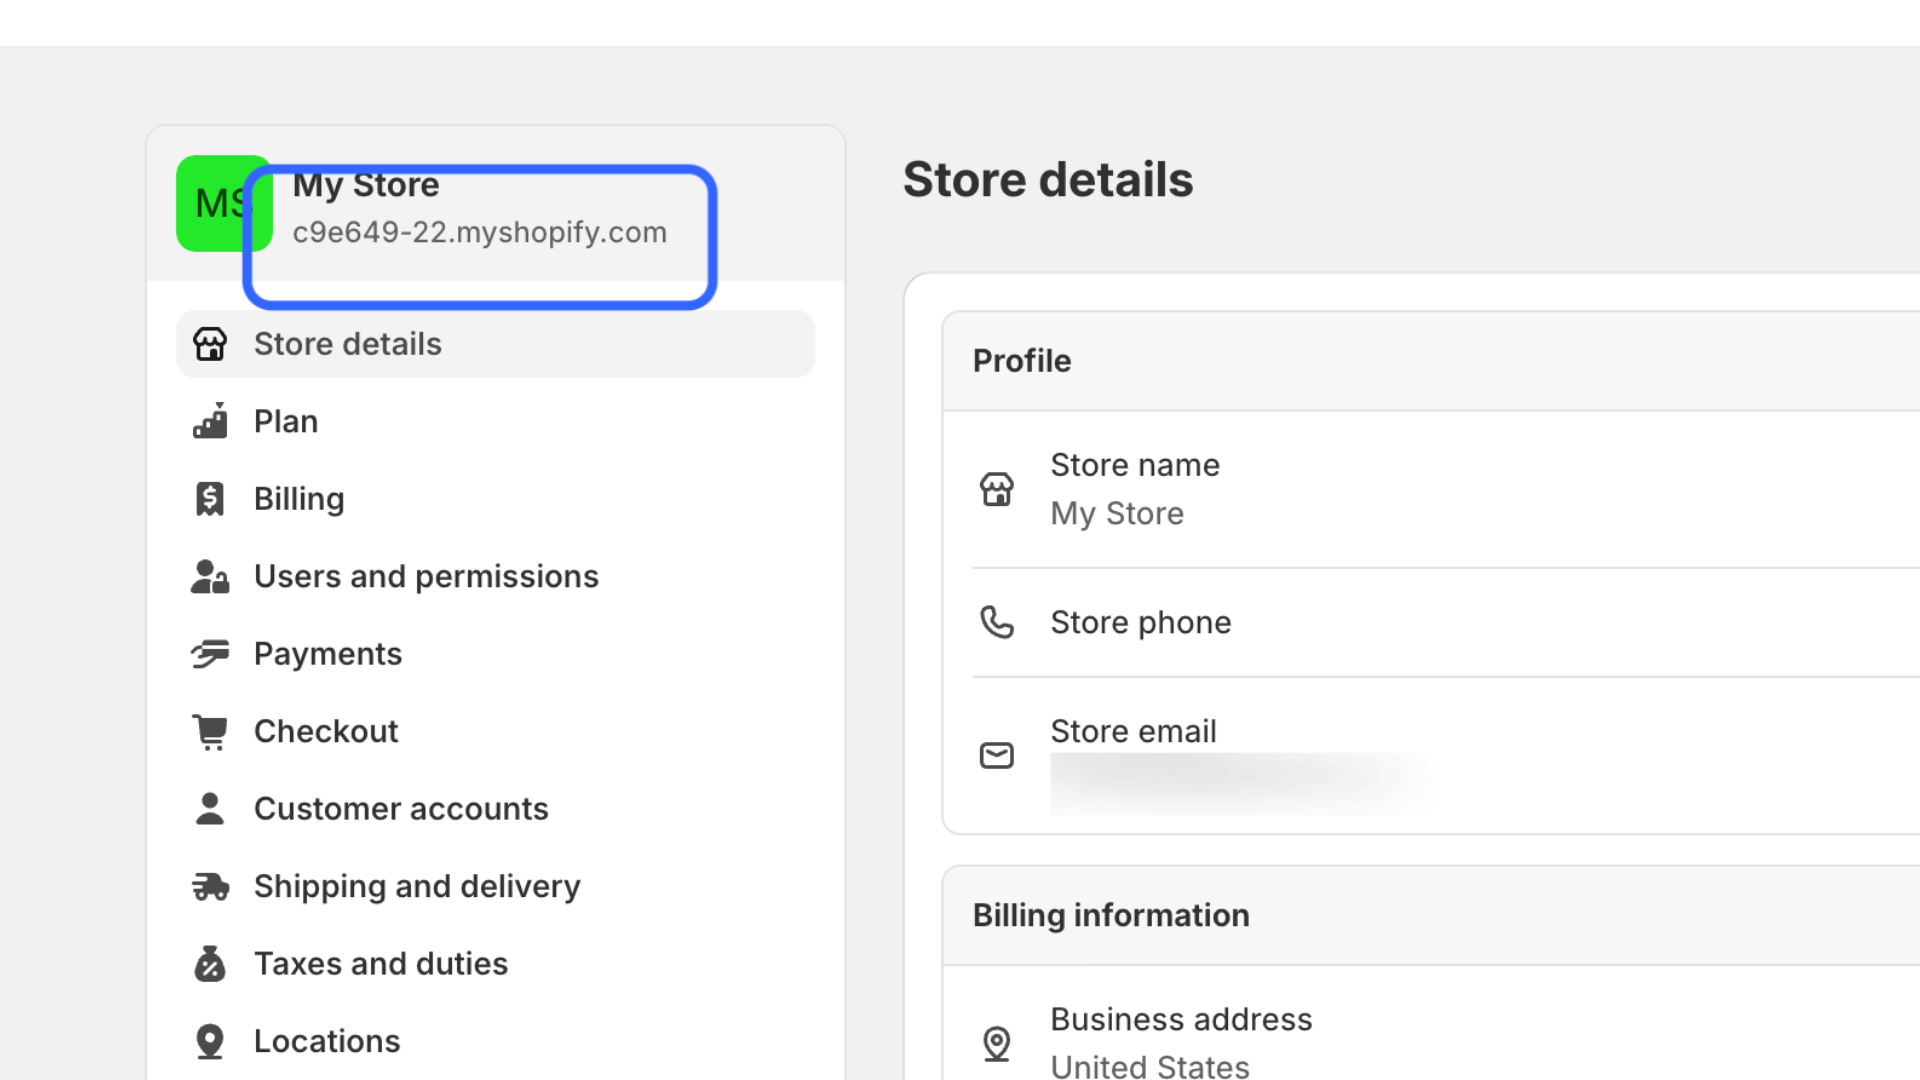
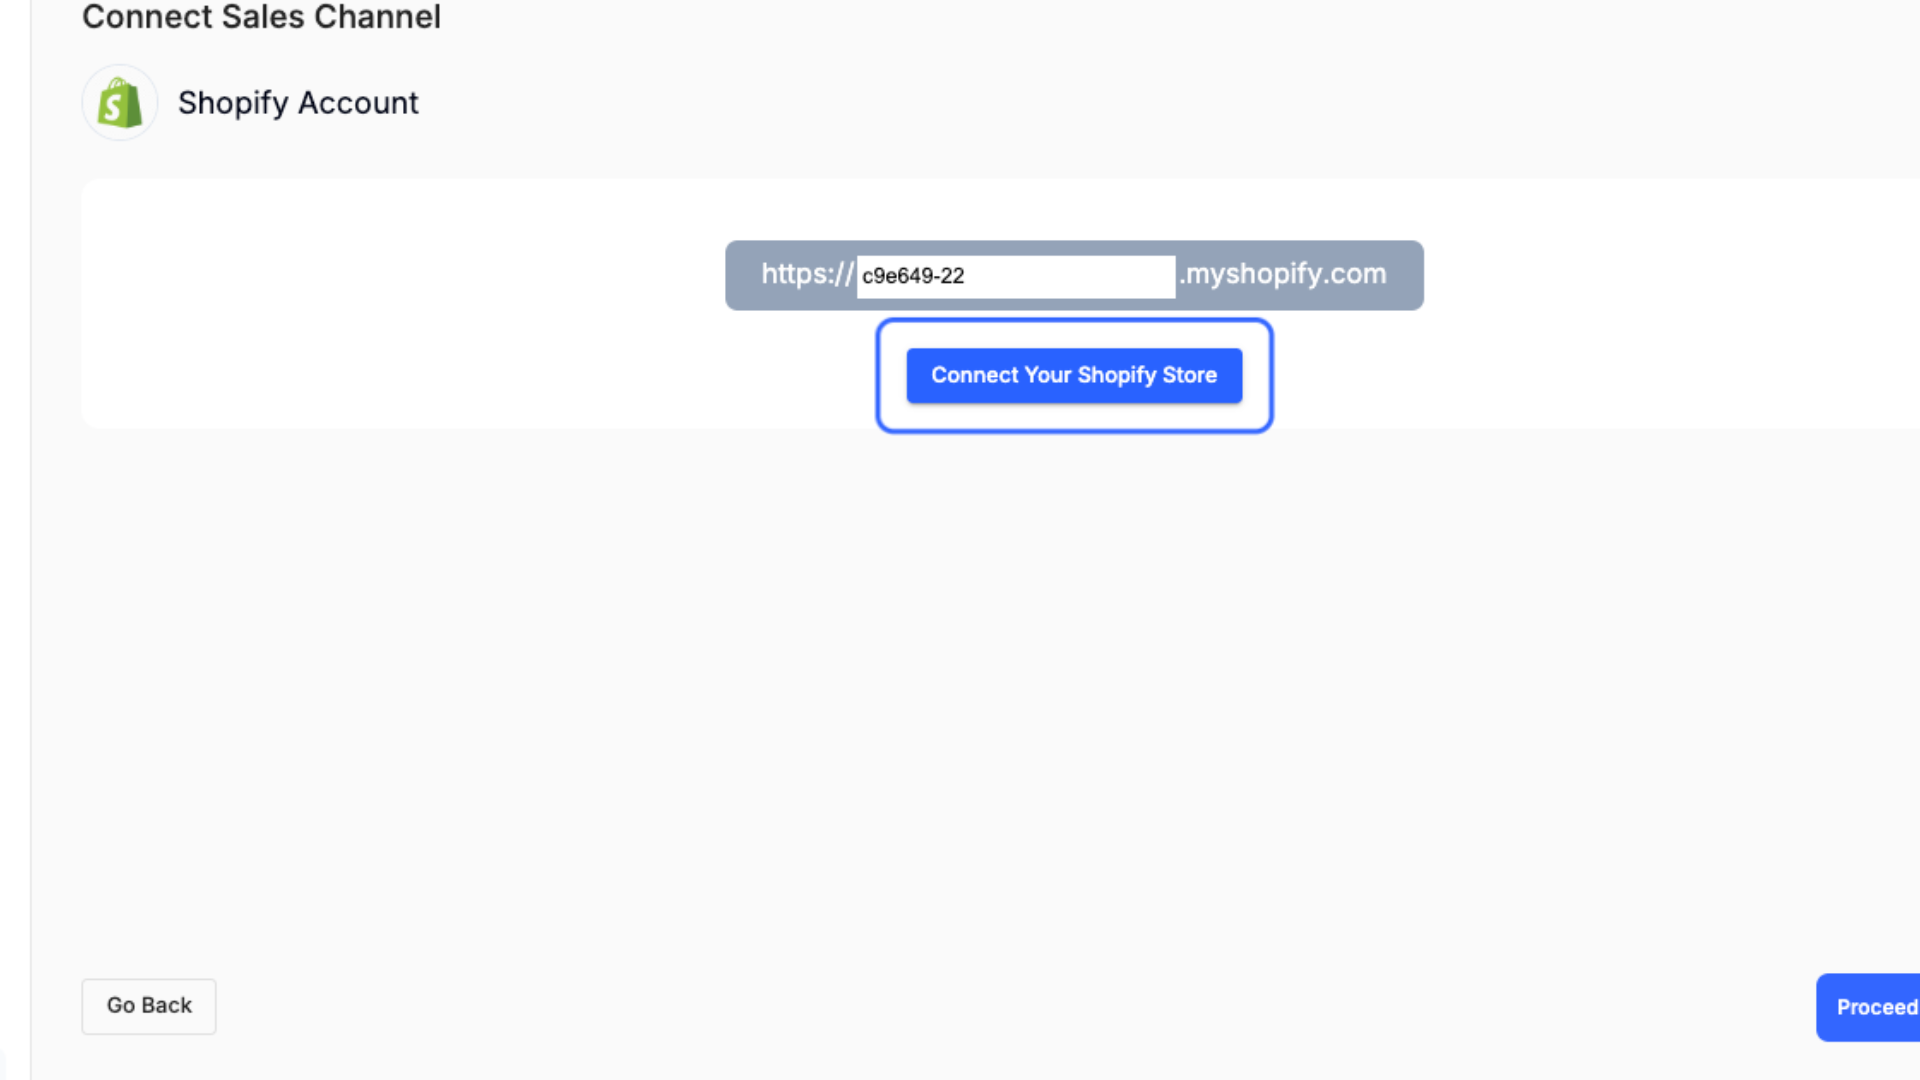
To find your subdomain, head over to your Shopify dashboard and select the Settings button on the bottom left corner.
You should then see the subdomain text on the top left.
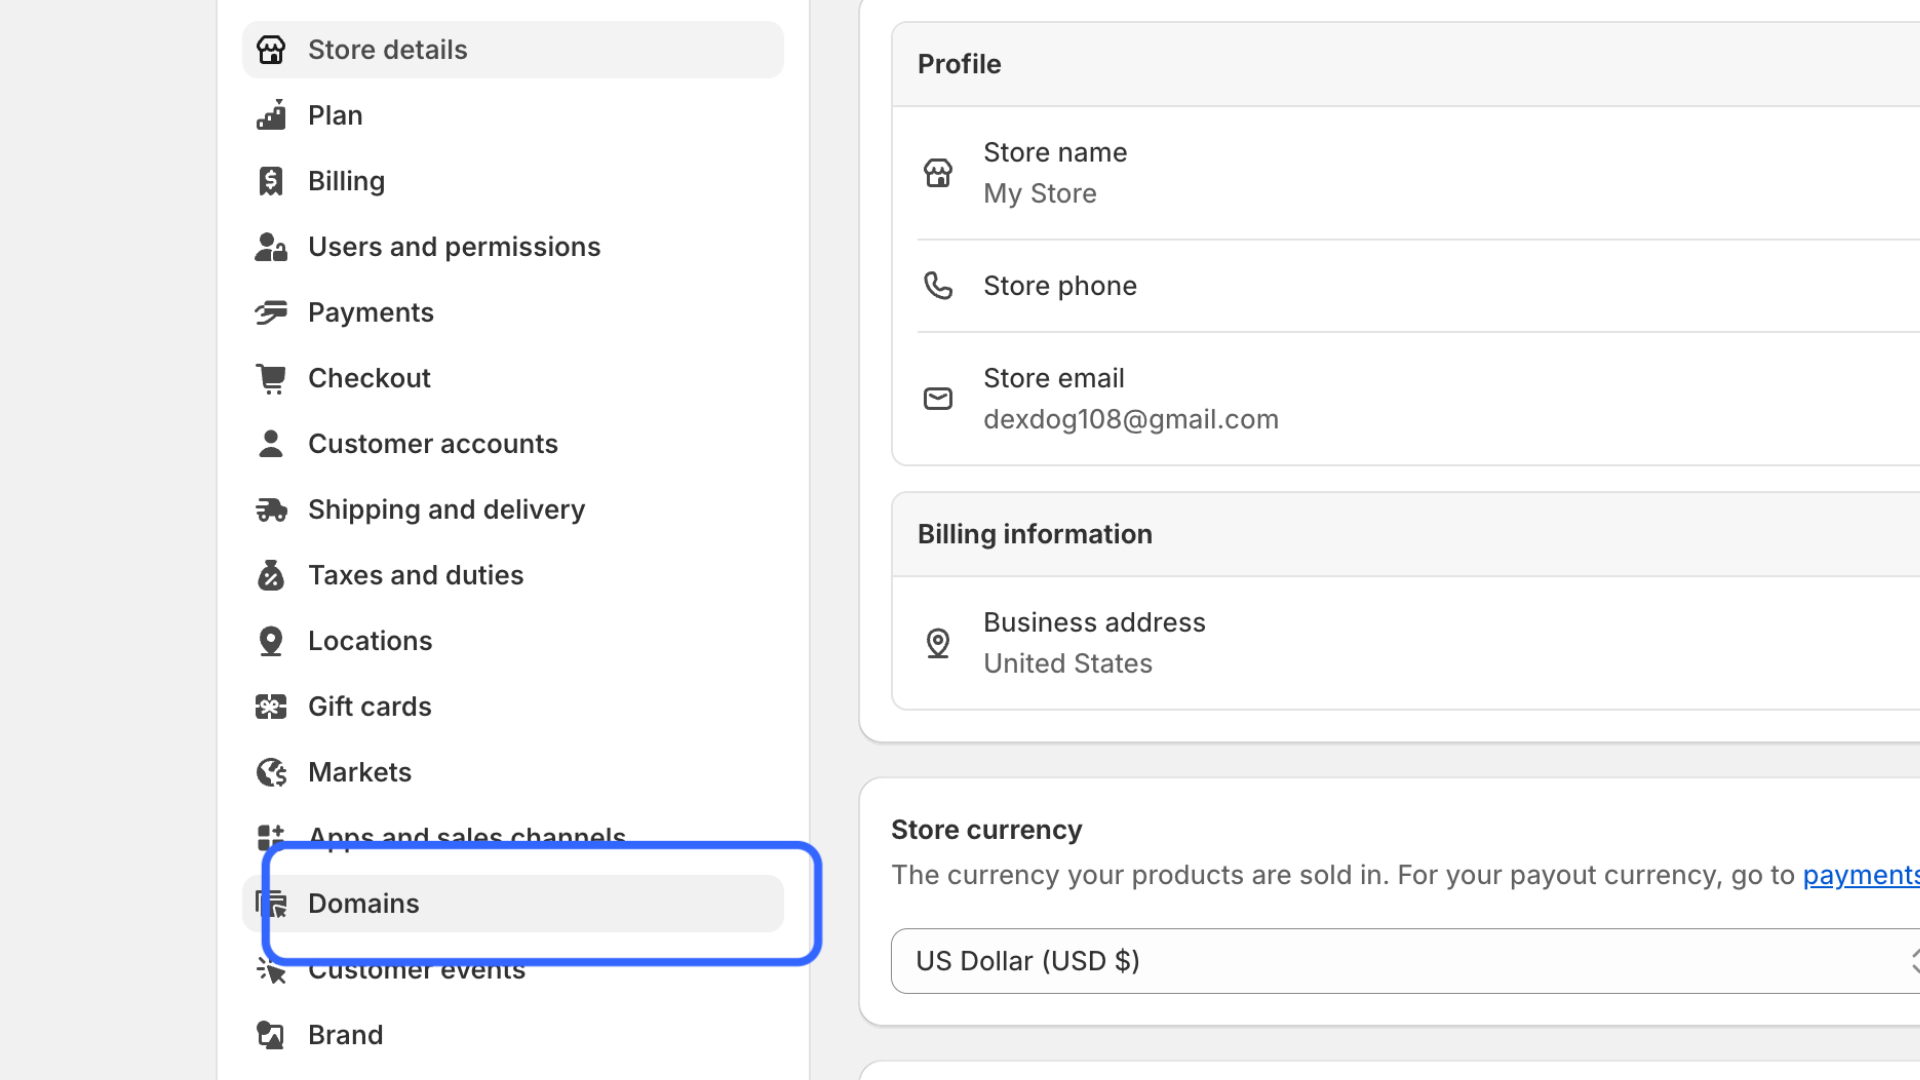
If you don't see the subdomain, for instance, if you are using a custom domain, click Domains on the left navigation bar.
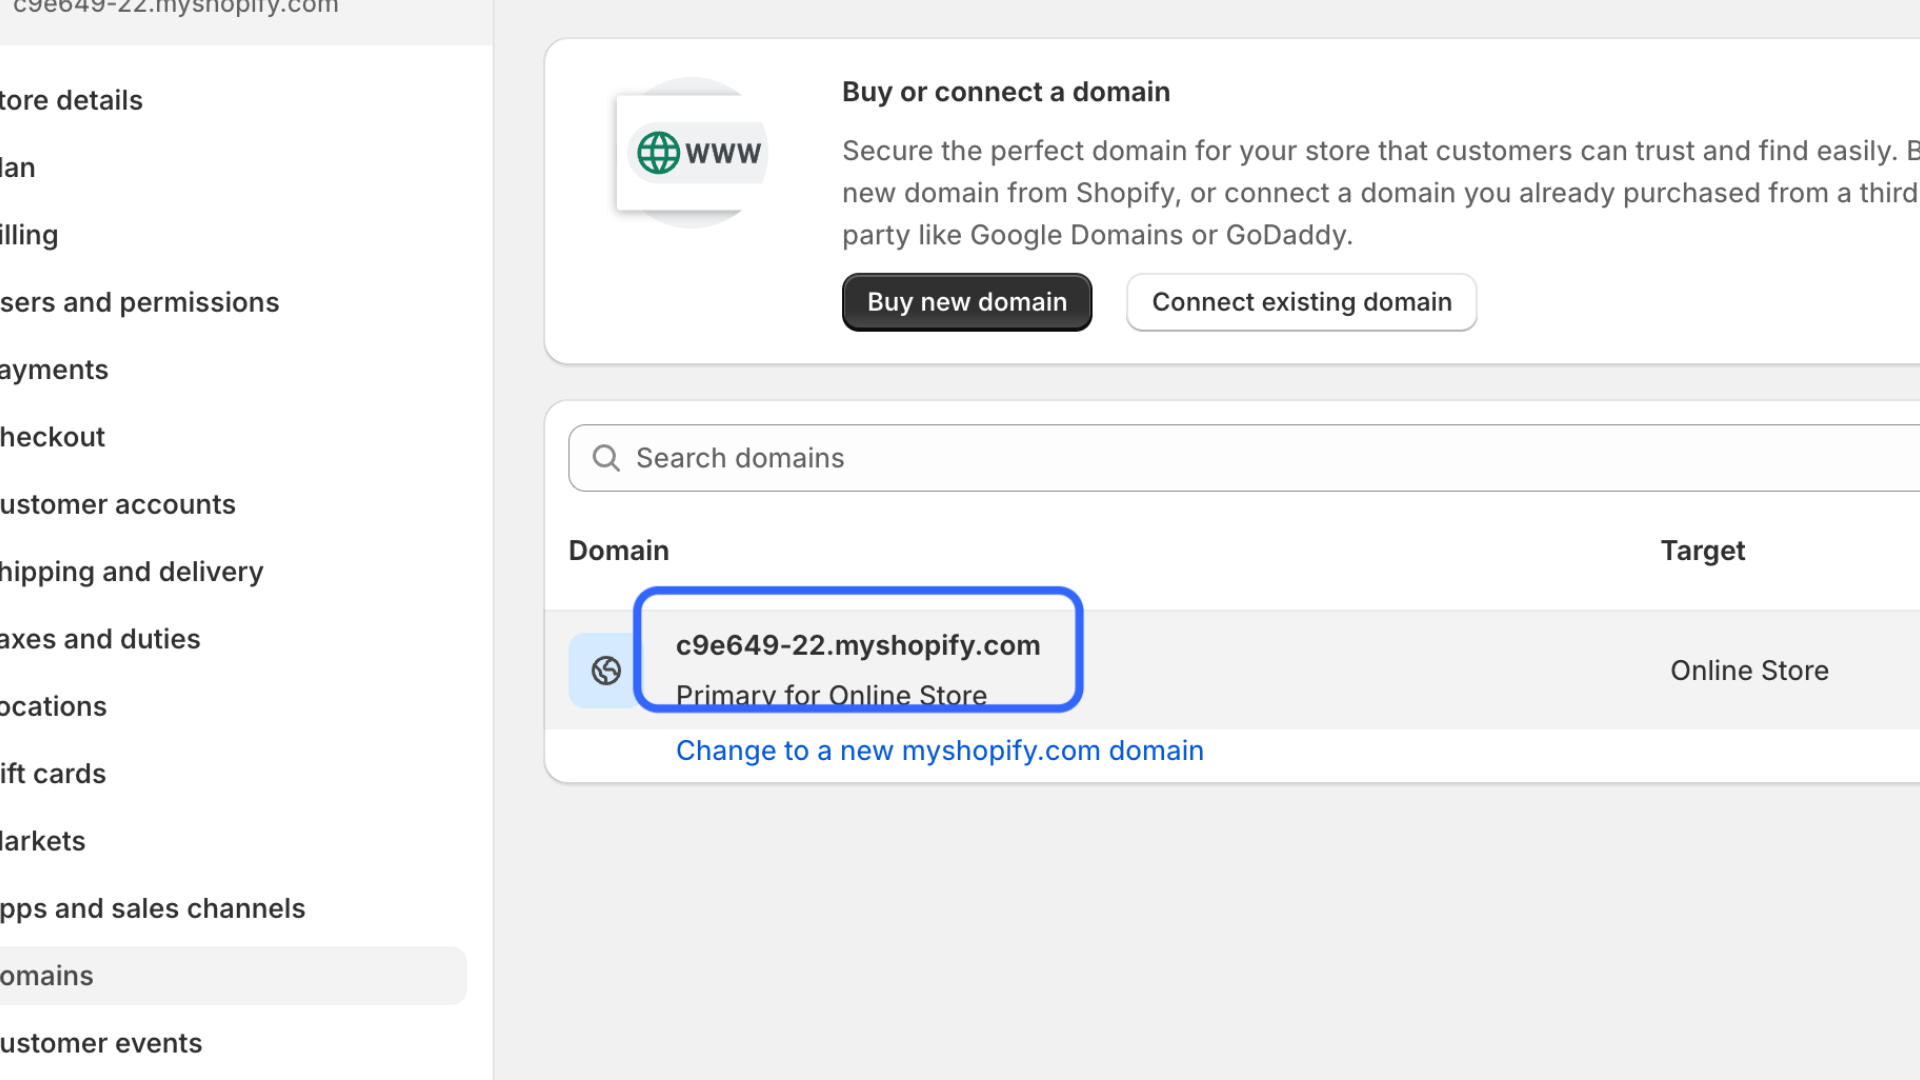
You should then see my Shopify subdomain in the list. Copy this subdomain.
Head back over to Taxomate and enter the first part of the domain before my Shopify.
Click on the Connect Your Shopify Store button.
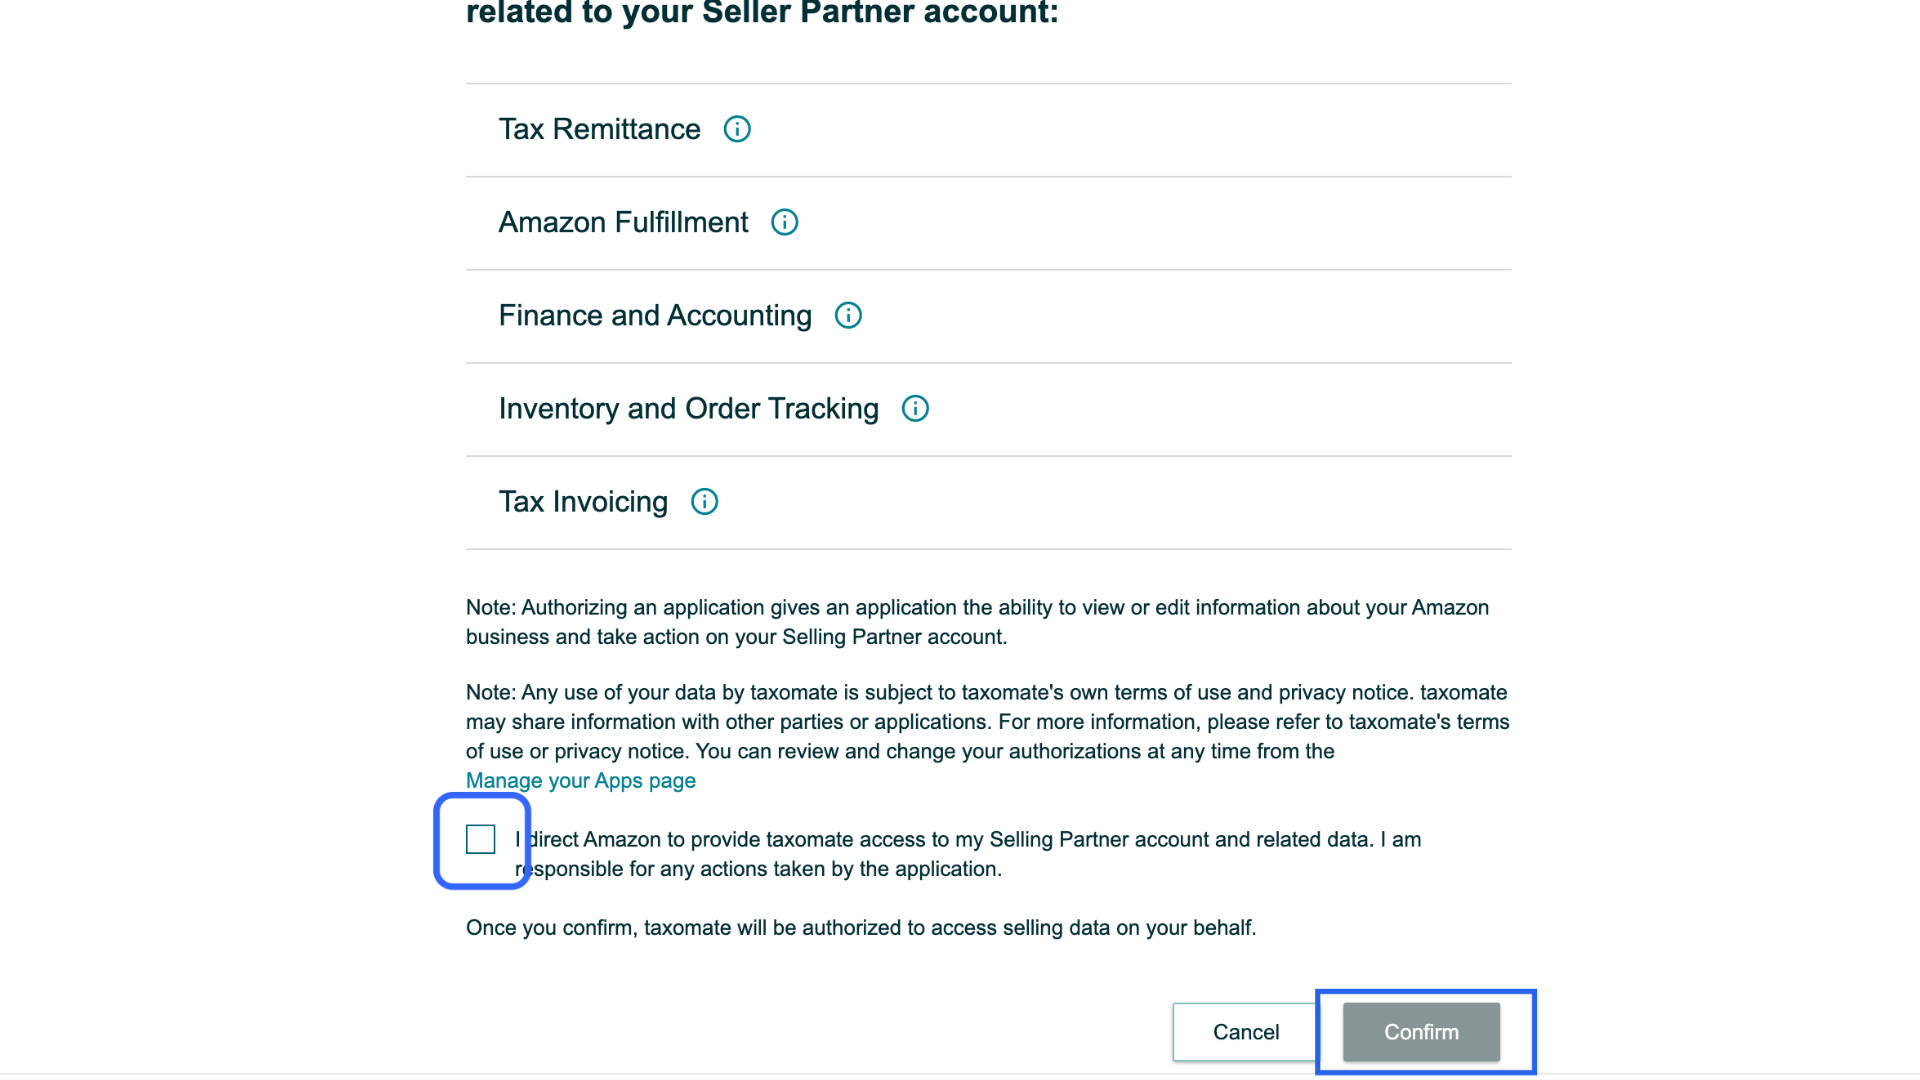
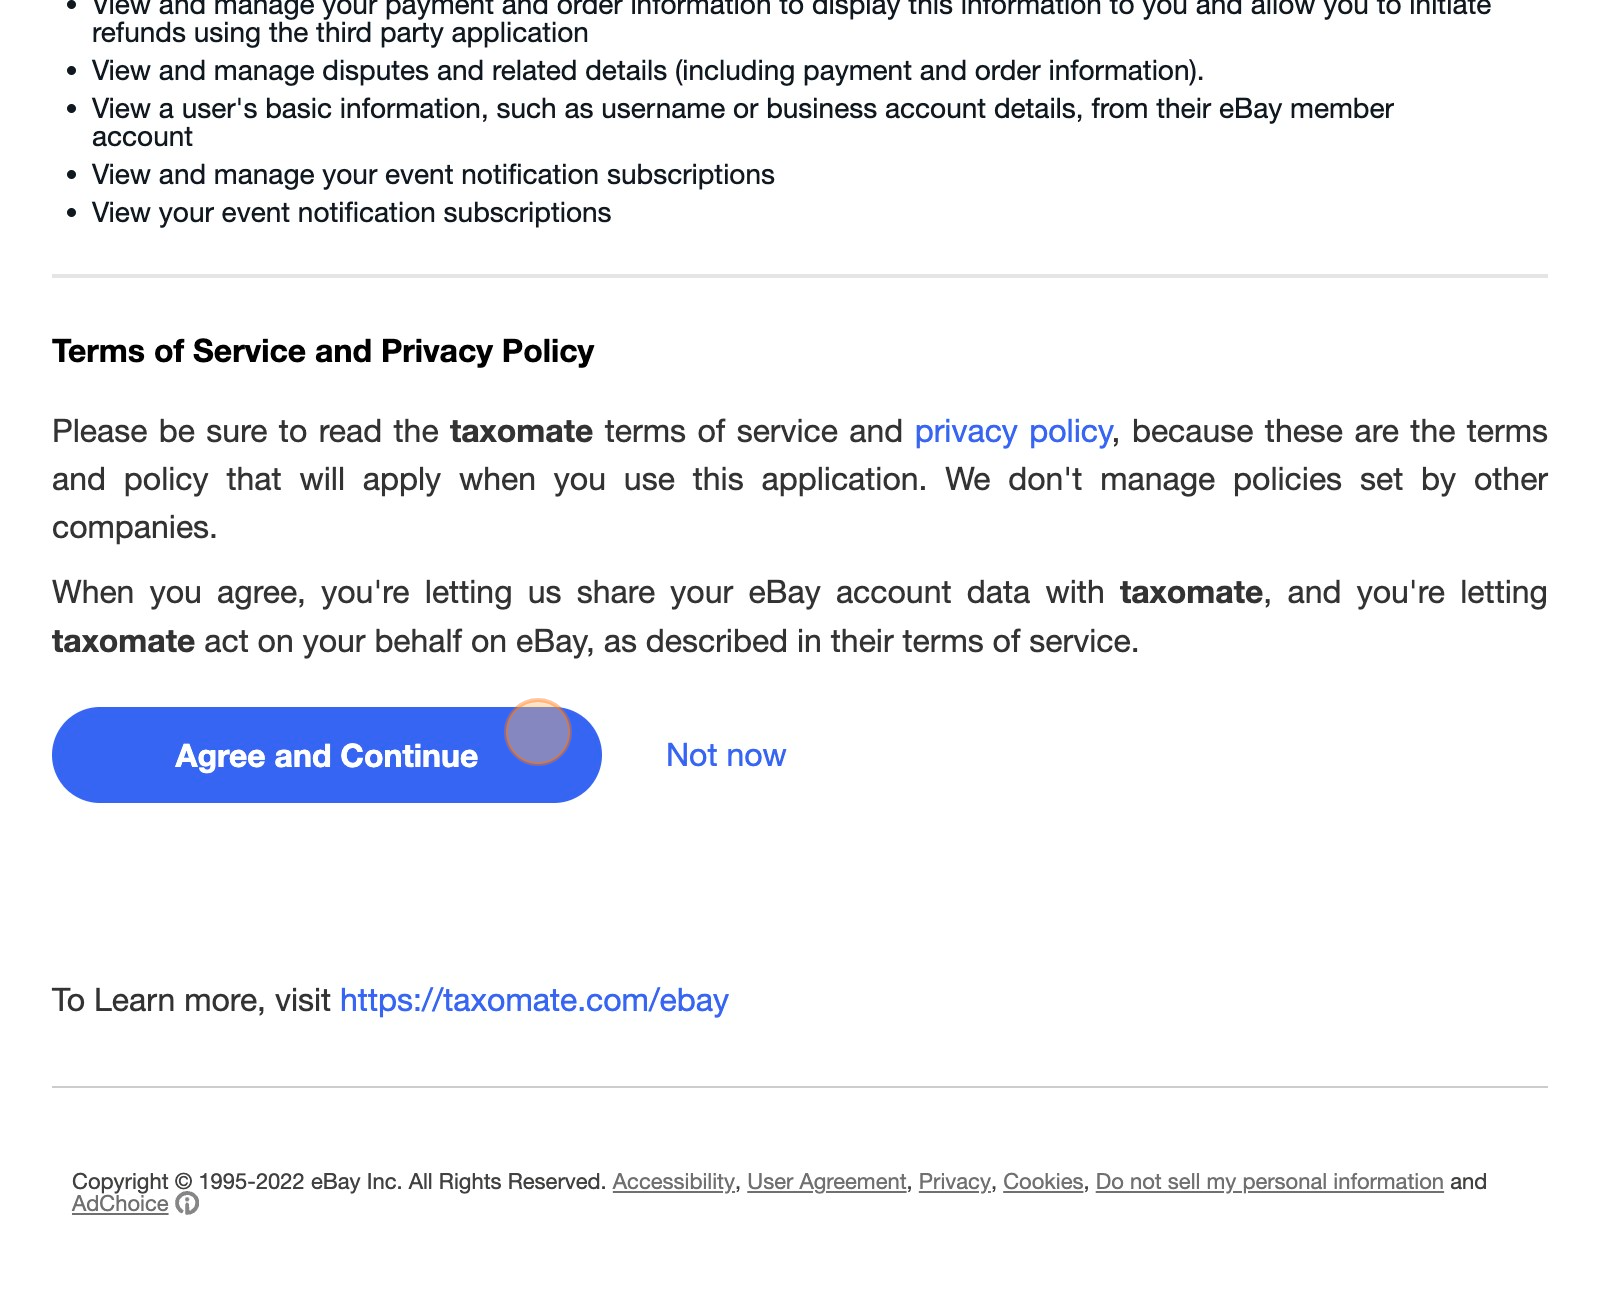
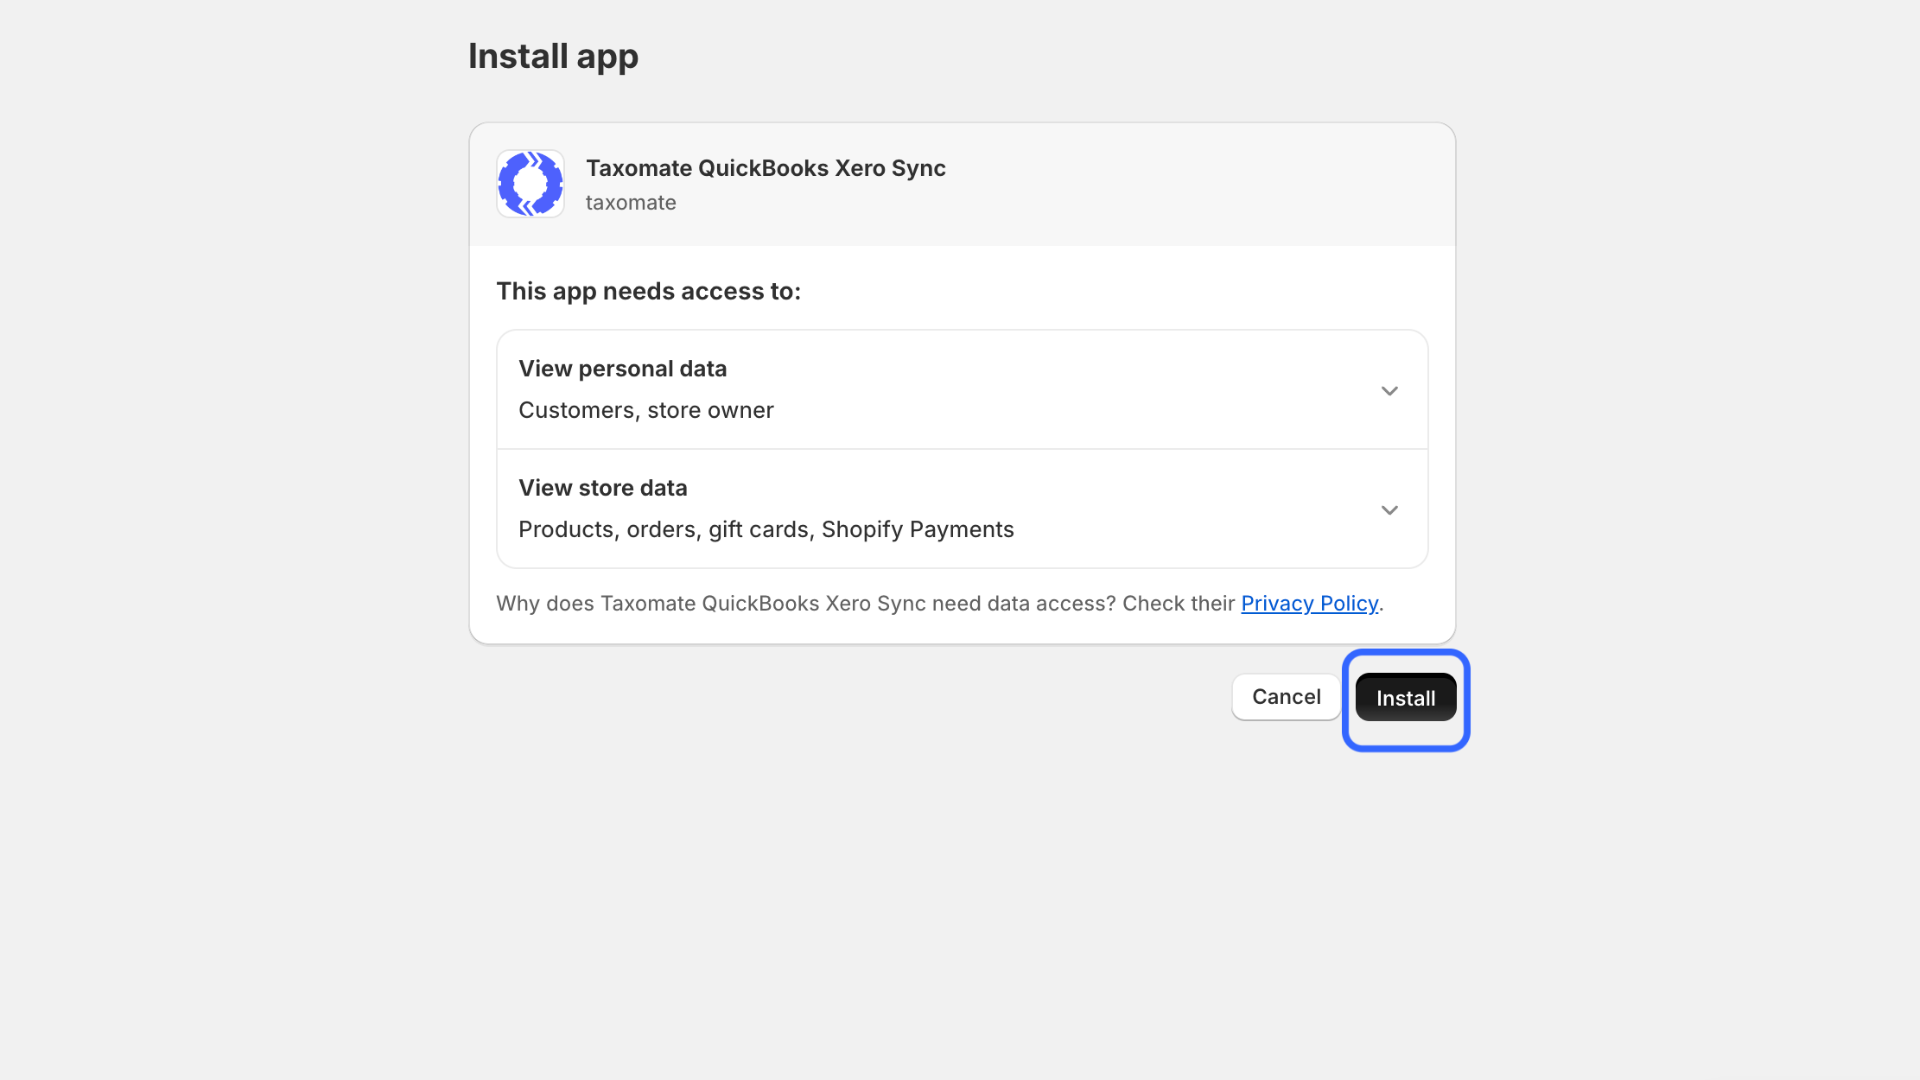
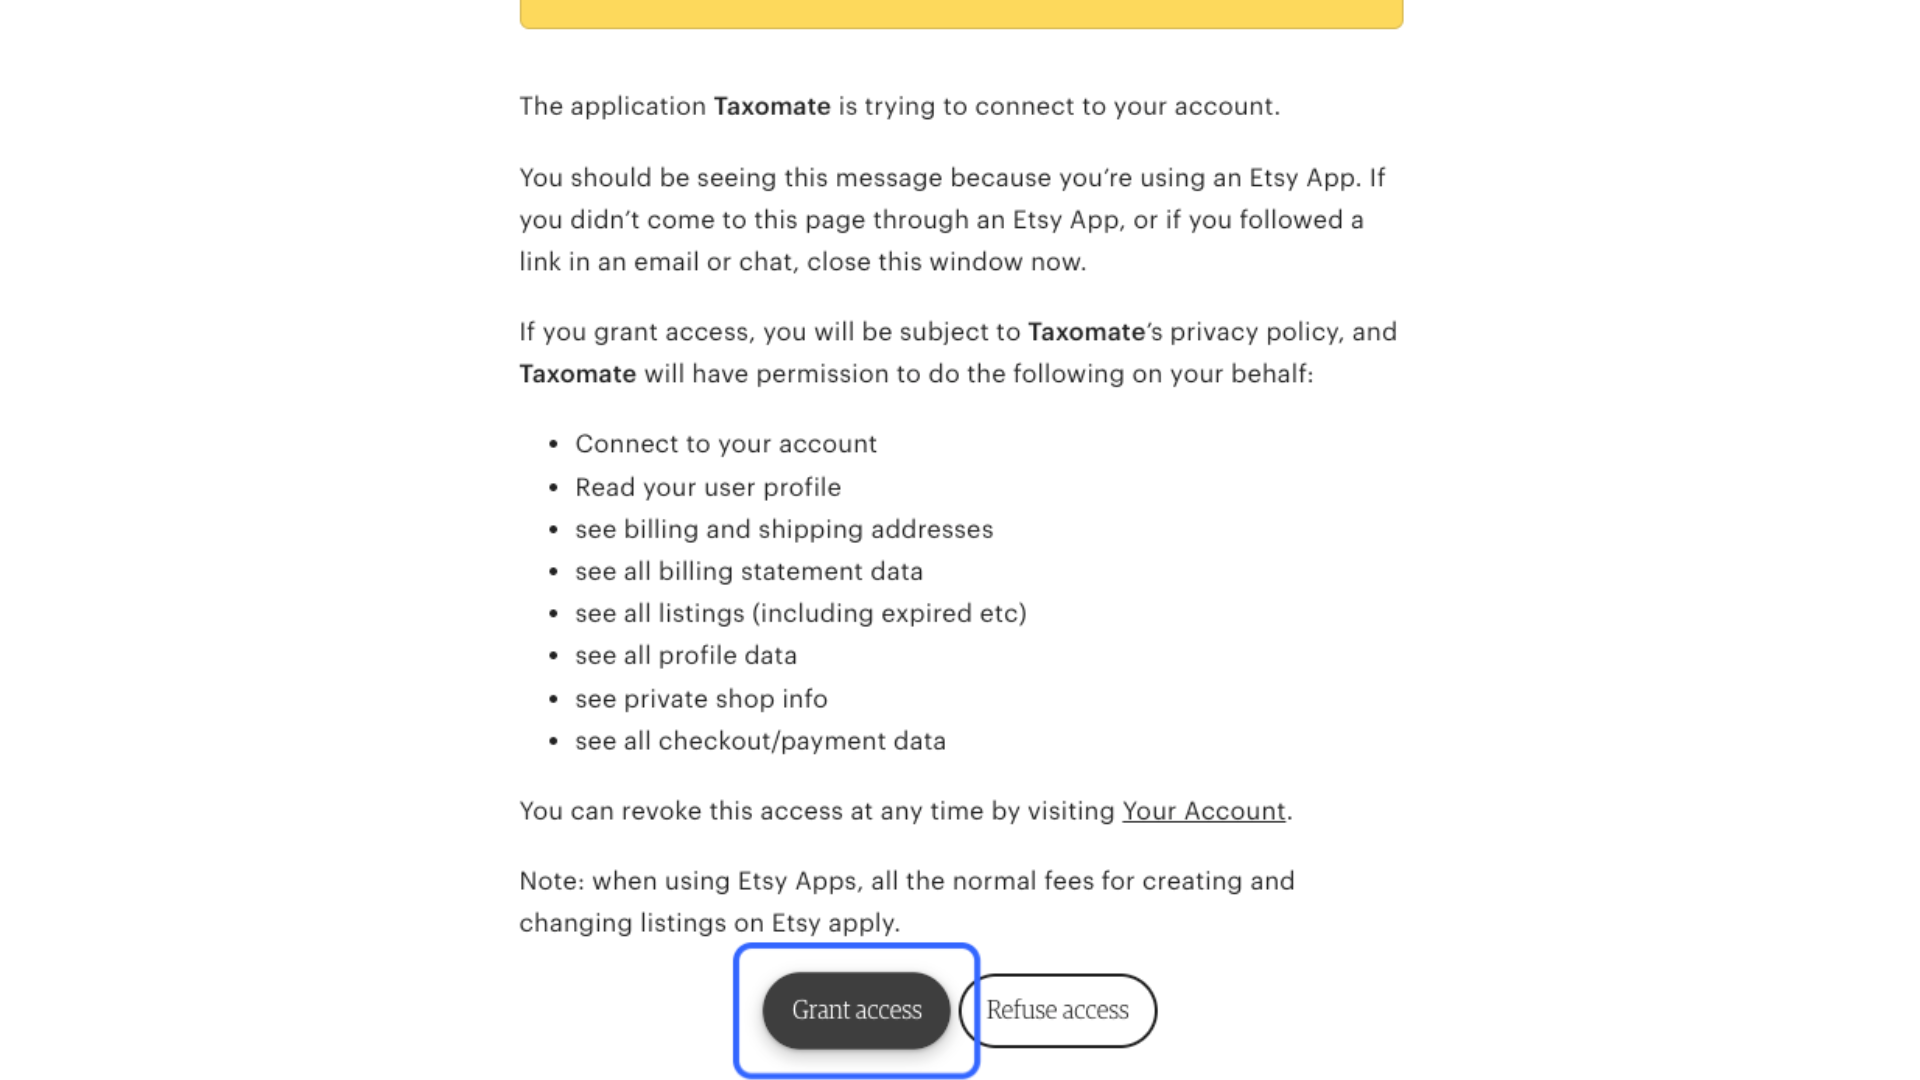
You will be asked to grant Taxomate access to your Shopify account data.
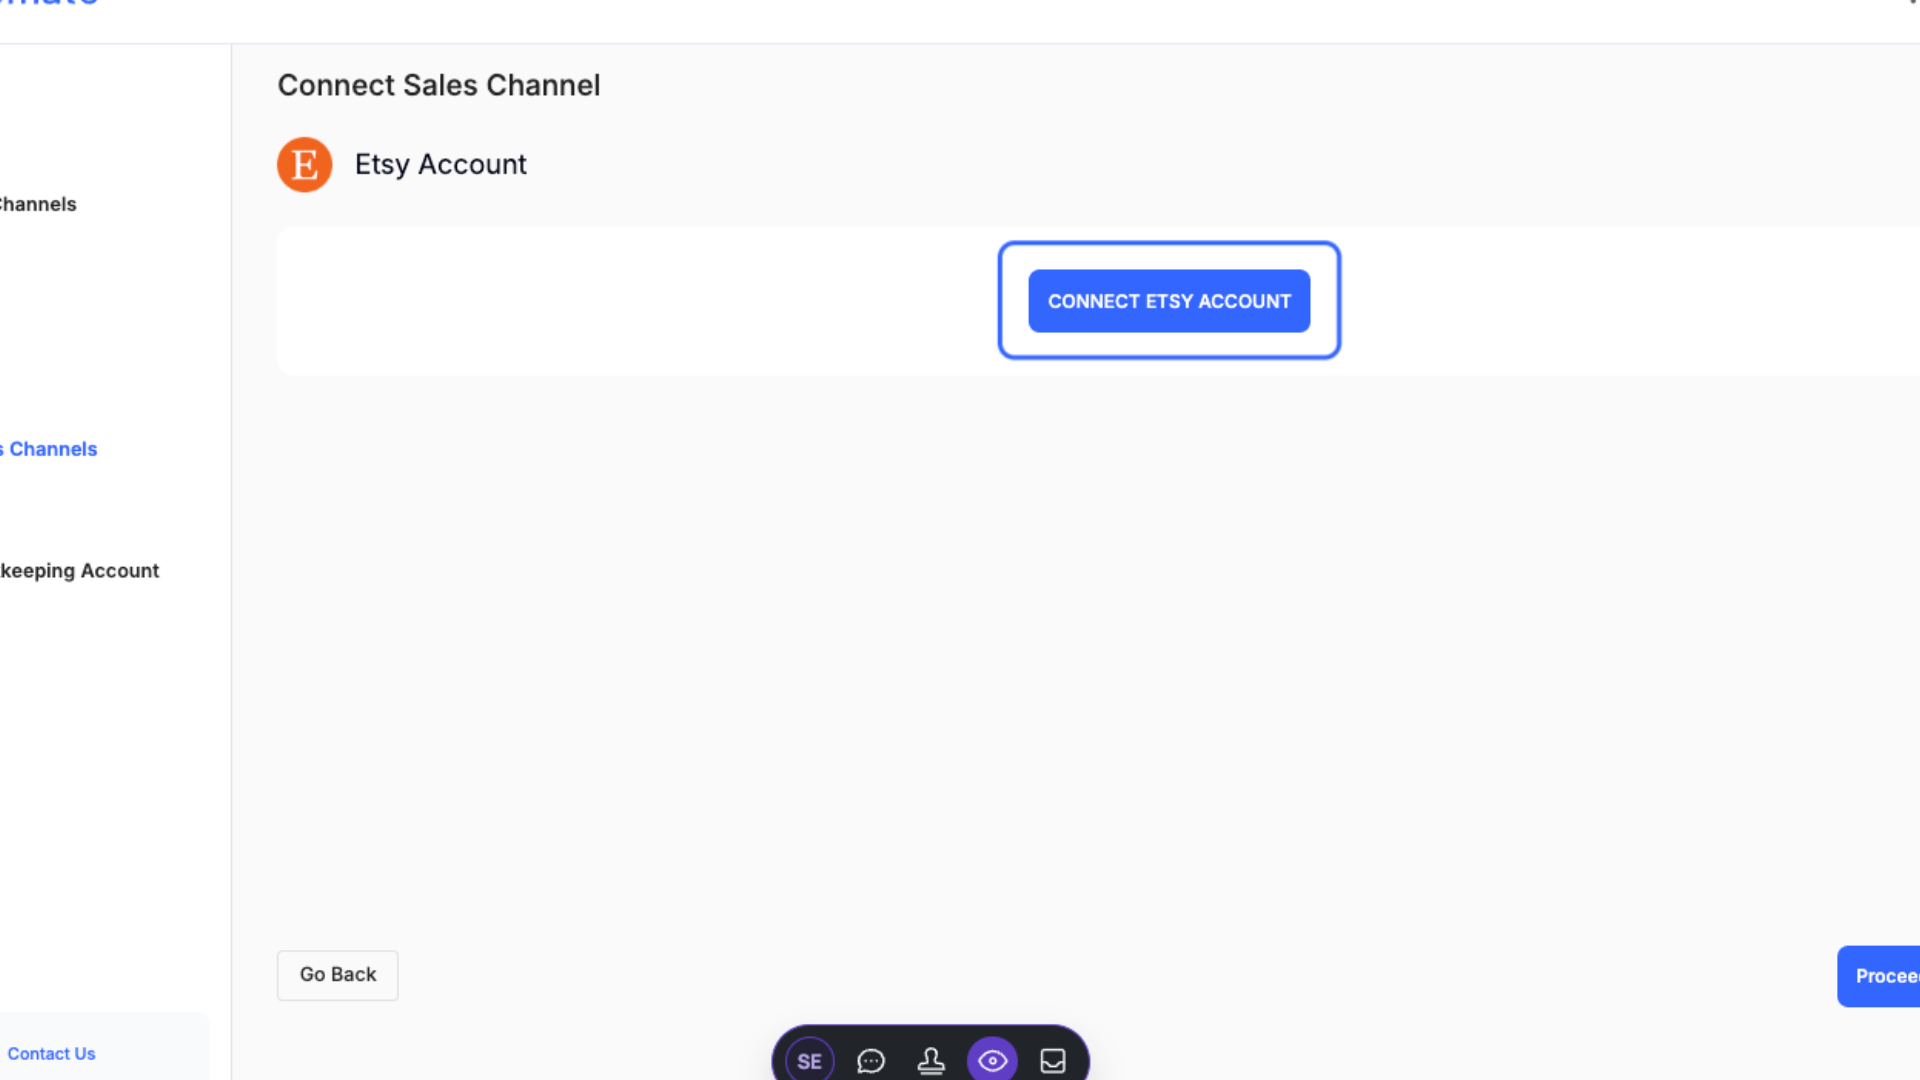
If you have signed up for our multi-channel plan and you would like to connect additional sales channels, you can do so by selecting the accounts dropdown on the top right.
Select the additional sales channel you would like to connect.
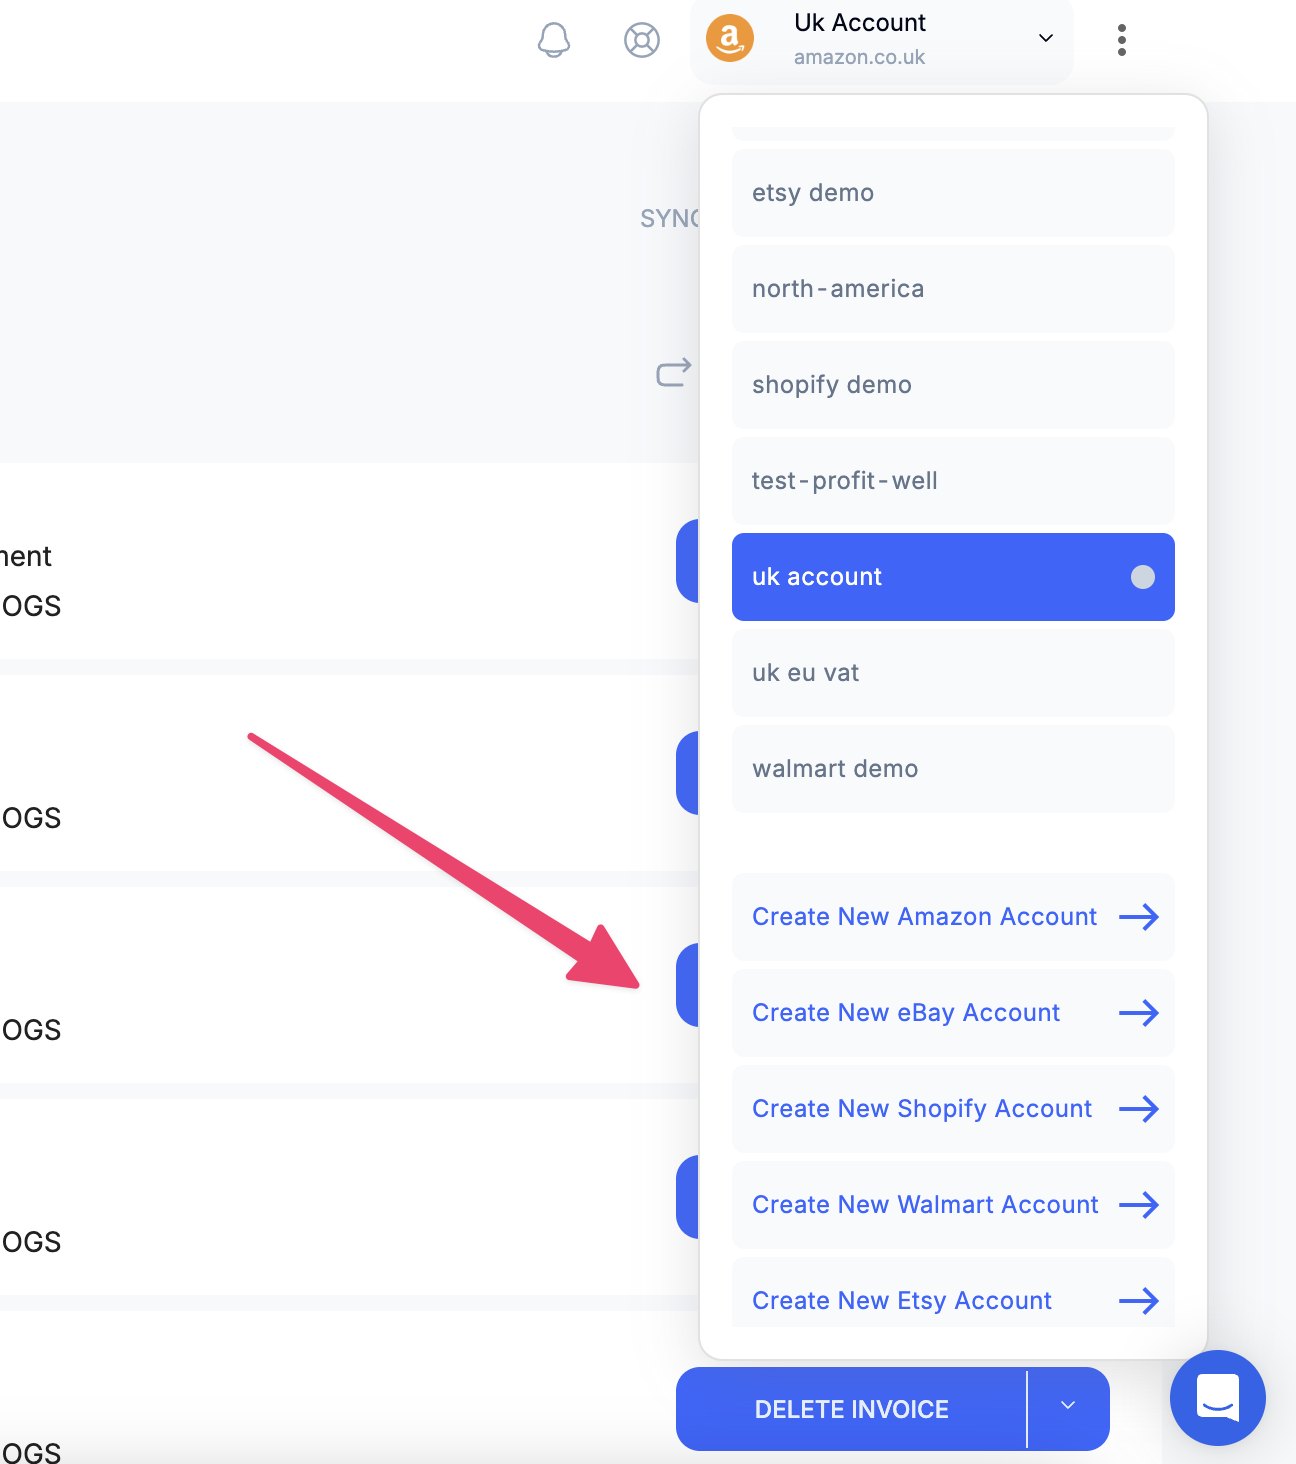
👉 If you are on the multi-channel plan, you can add as many additional accounts as you would like that are attached to your email and billing account.
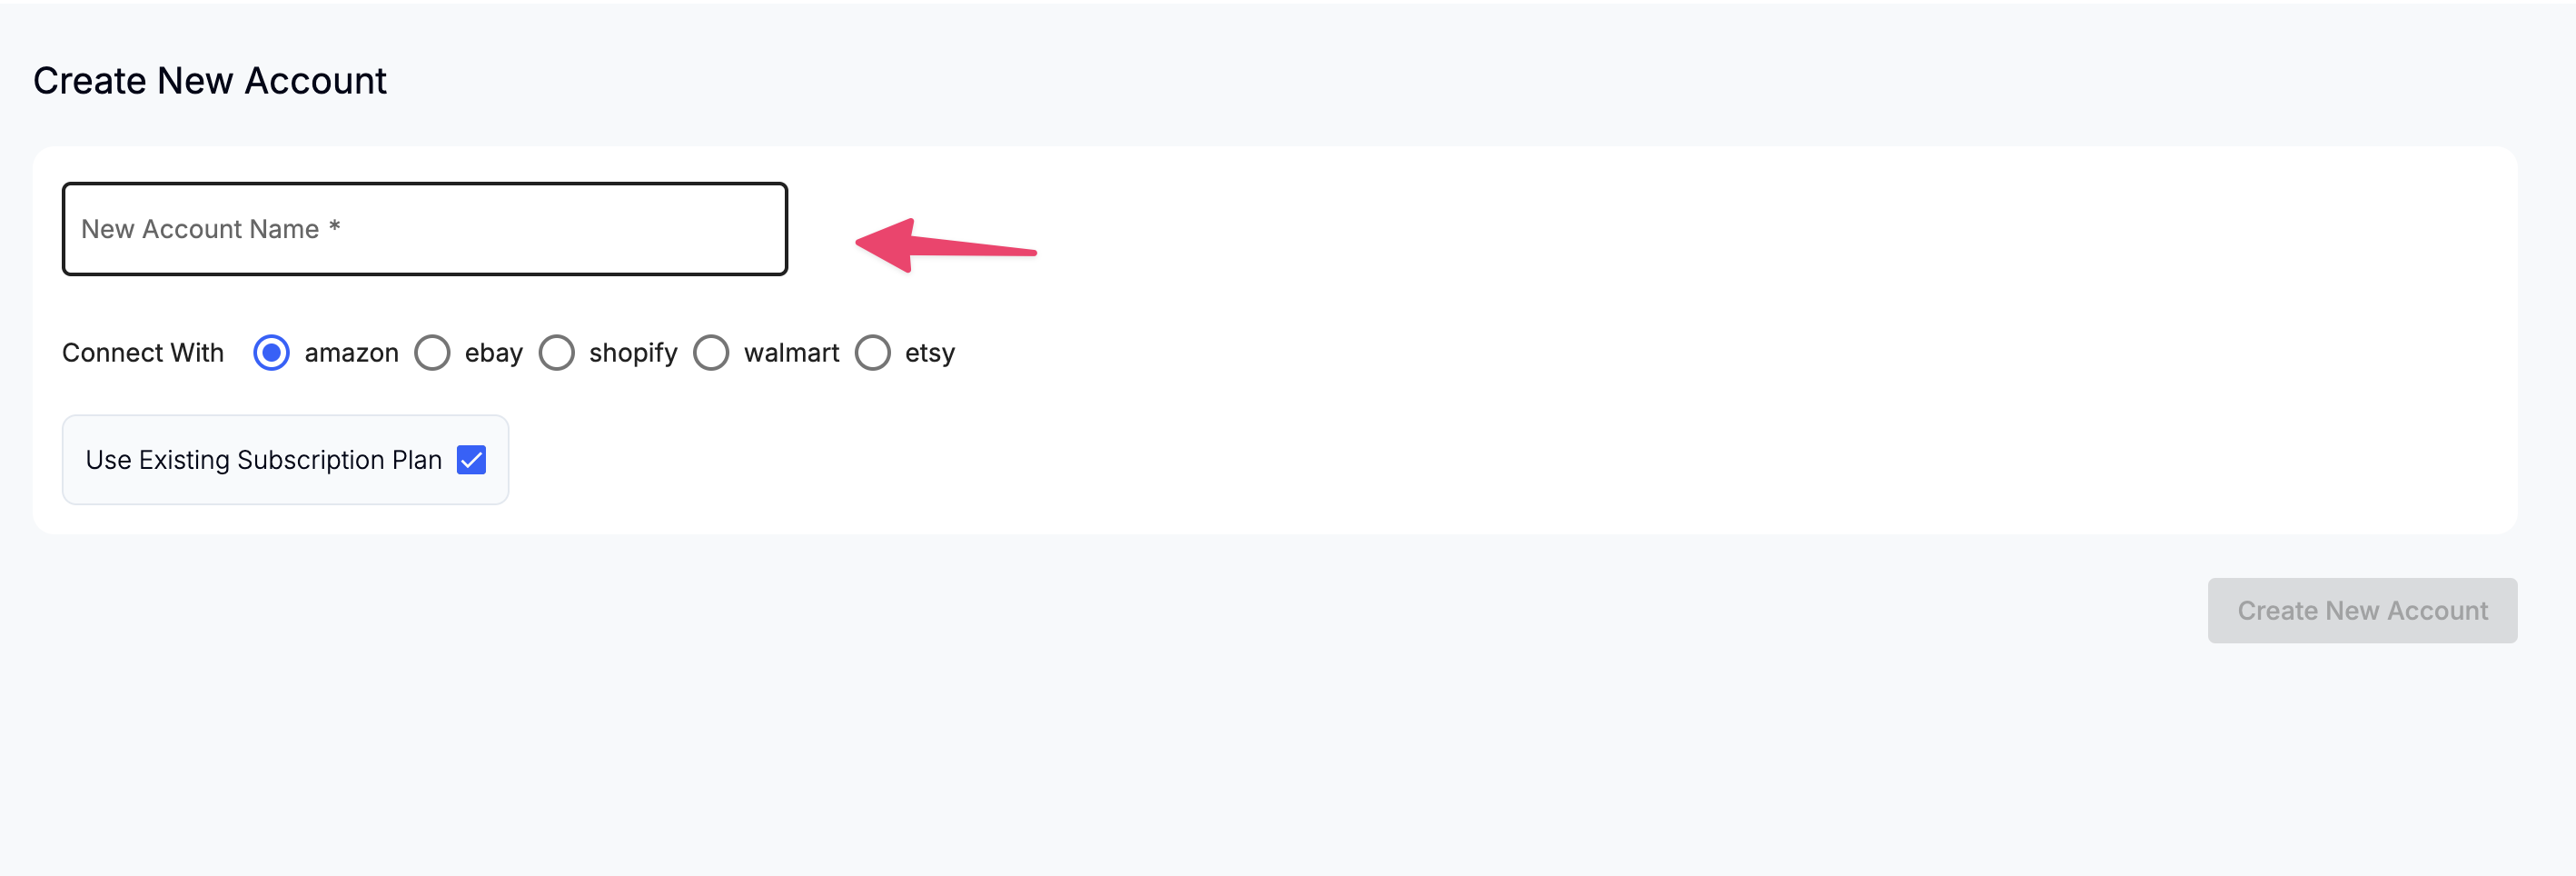
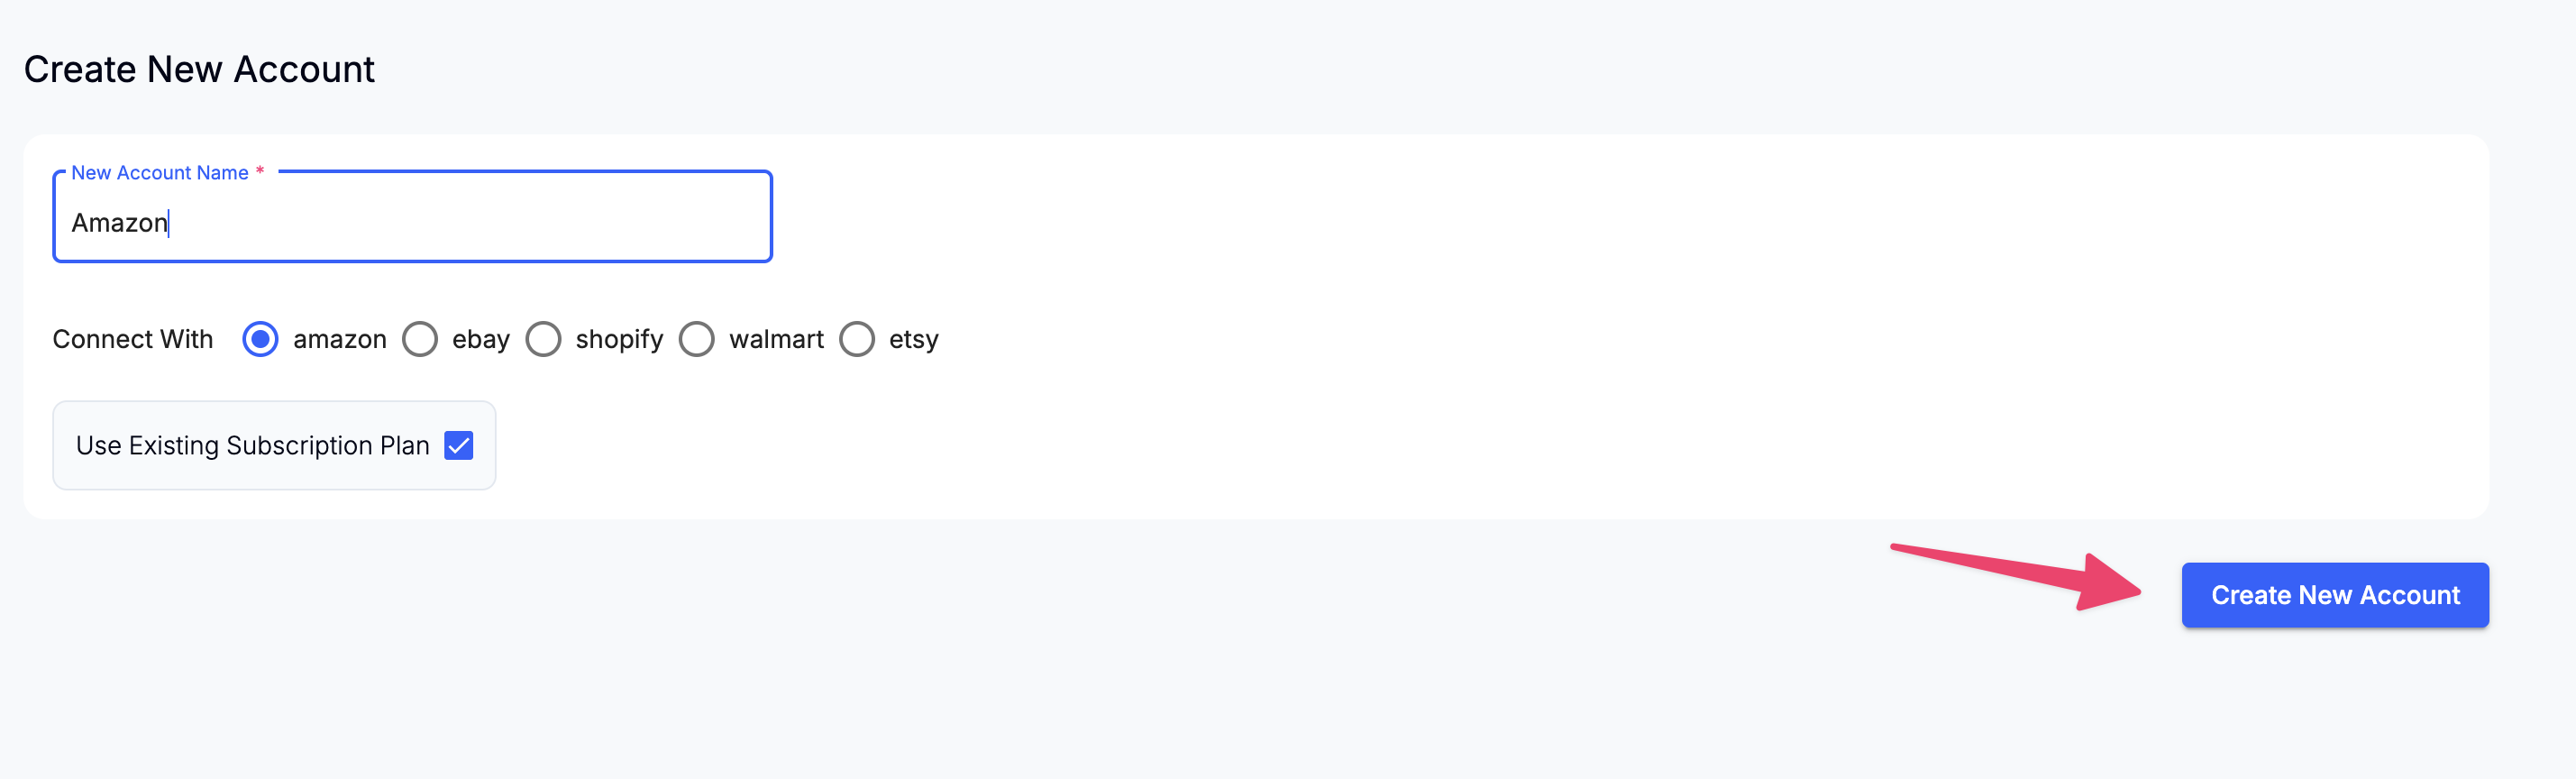
👉 You will then be redirected to Quick Setup for your new account to connect your sales channel and accounting software.
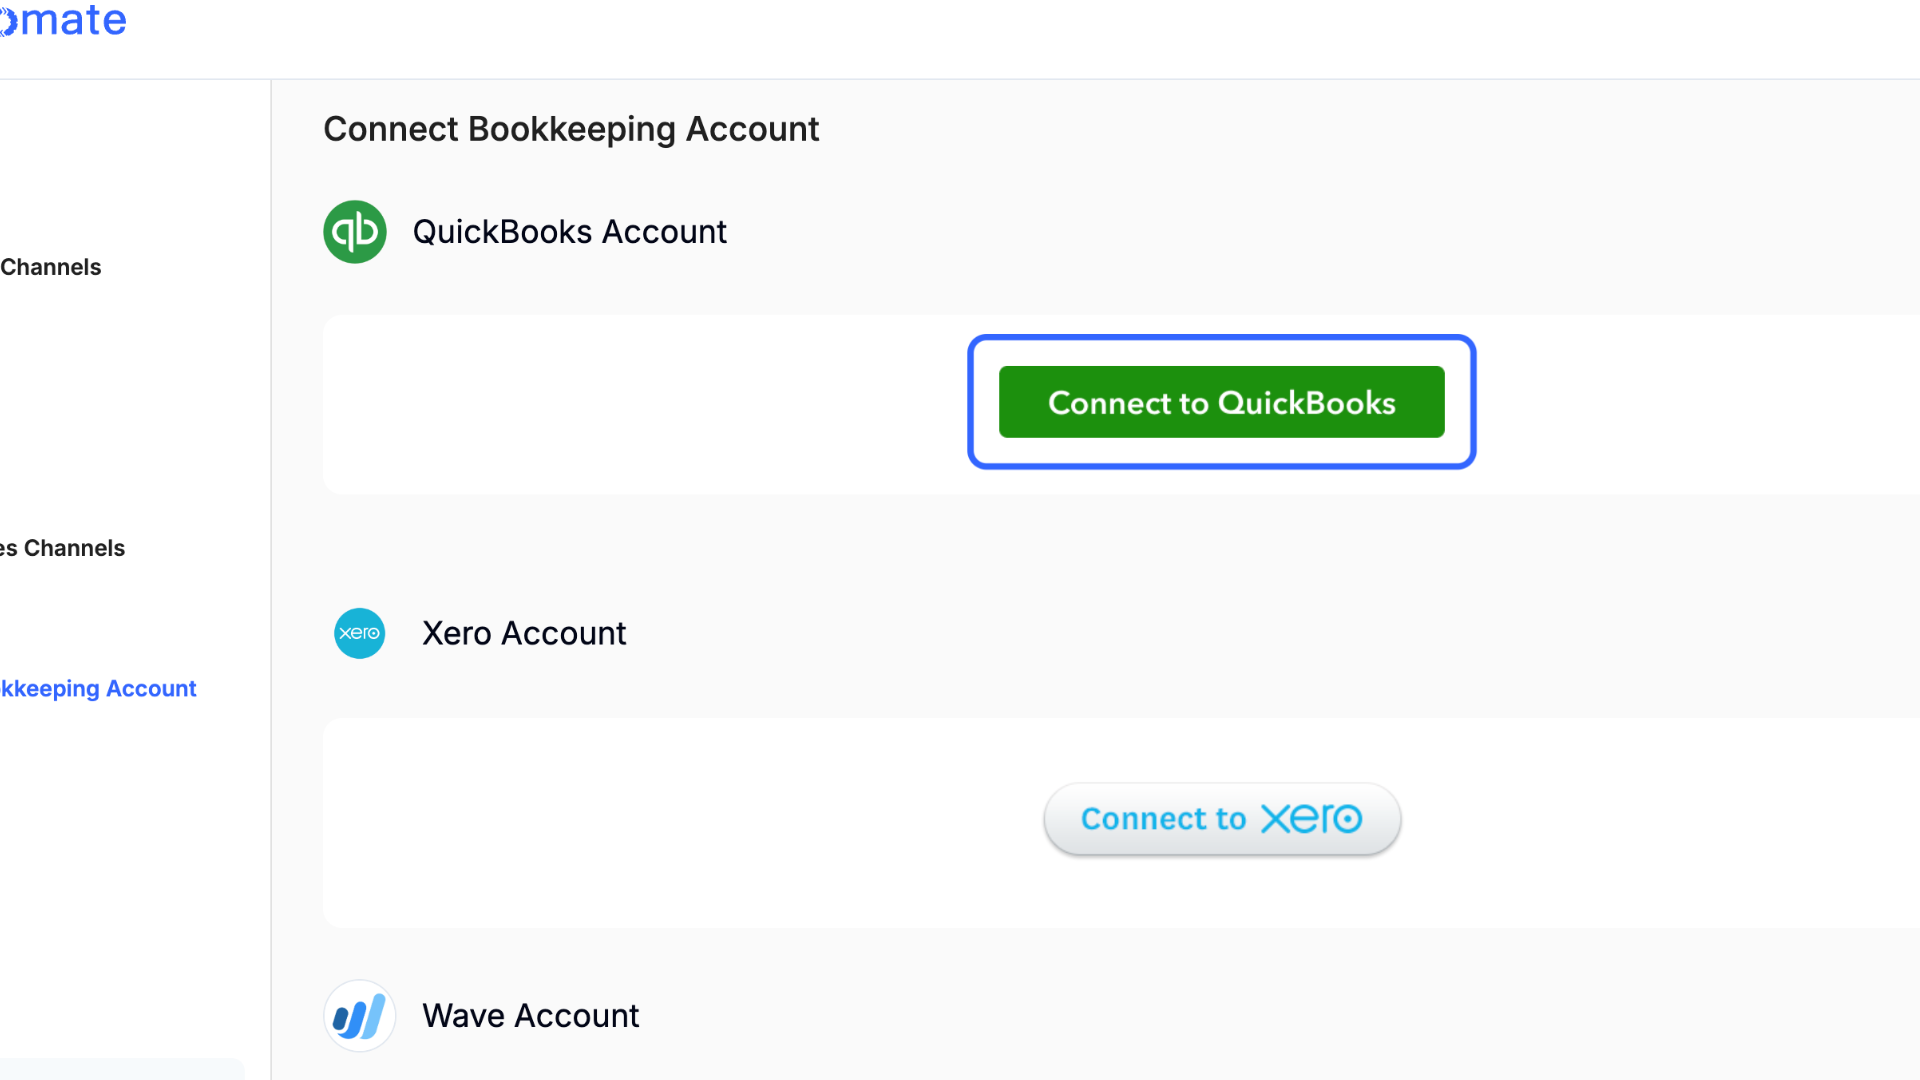
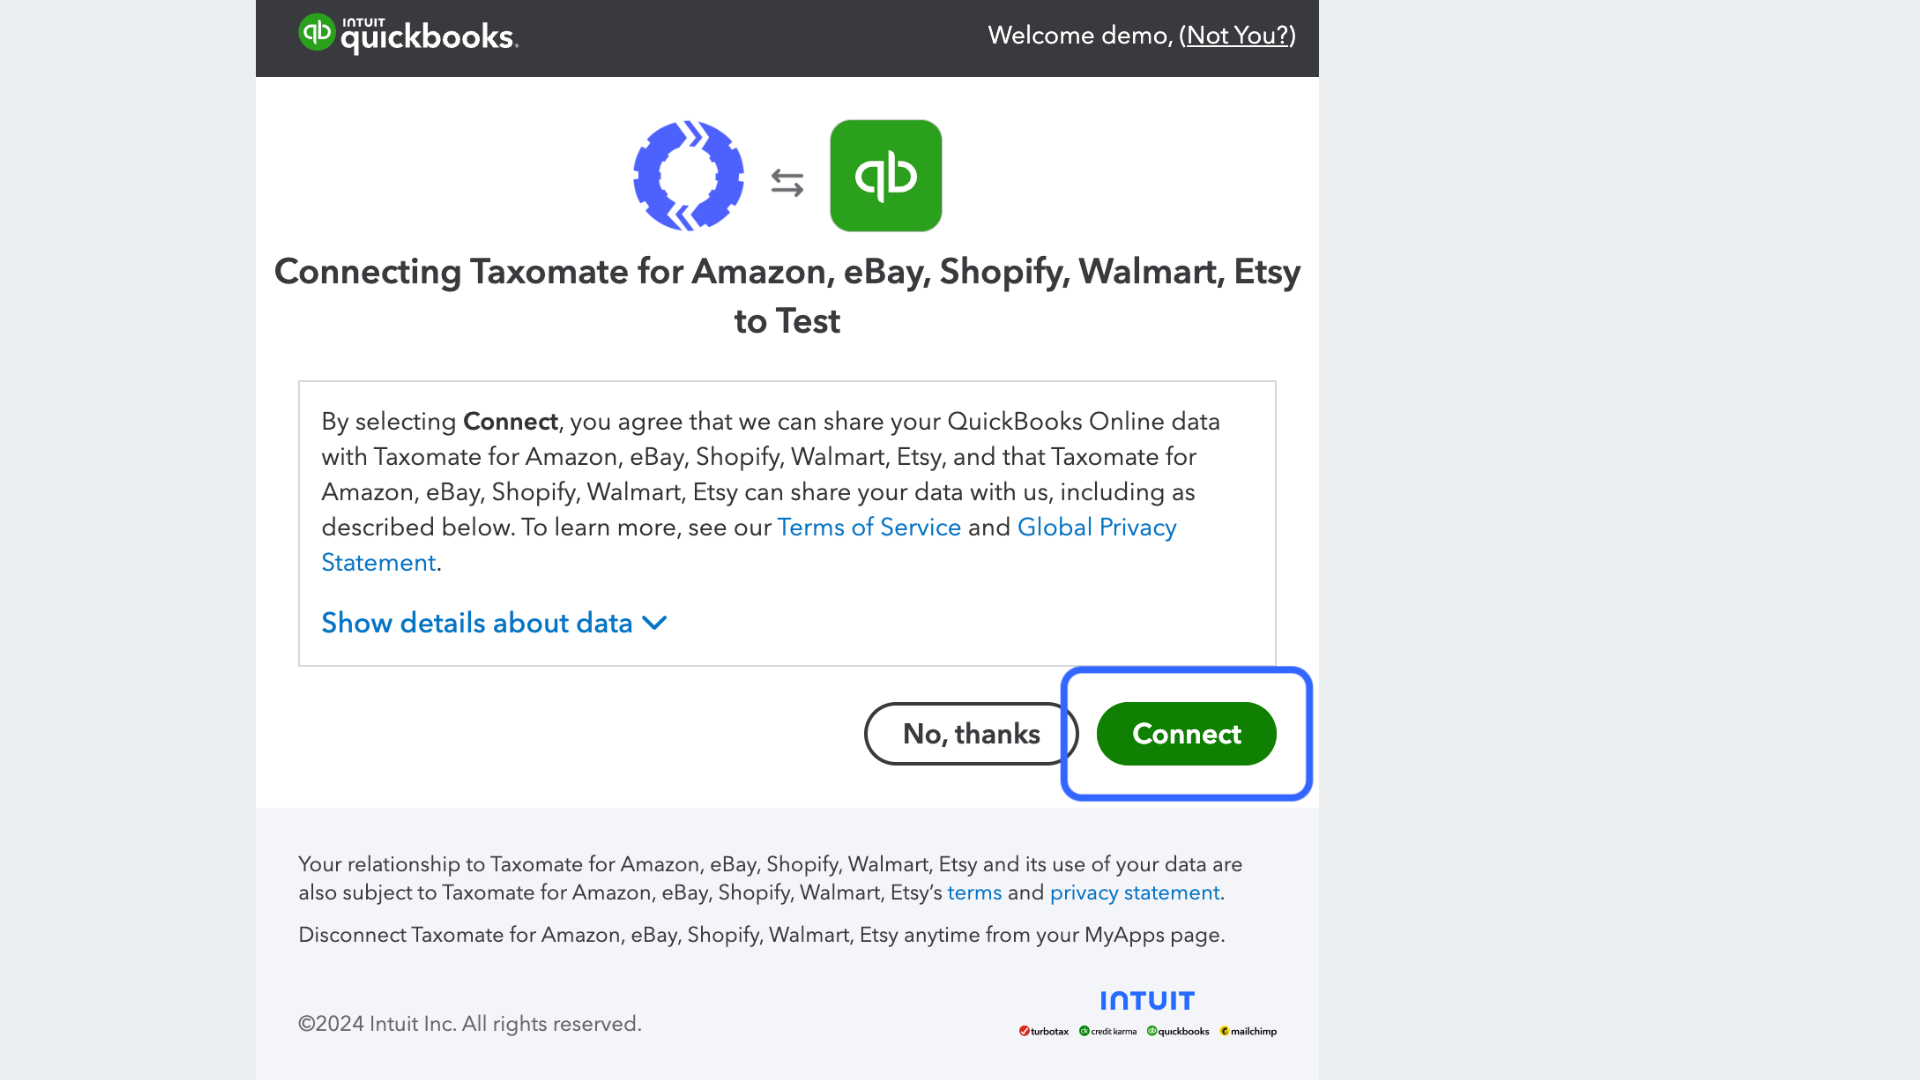
Select the Connect to QuickBooks button. You will then be redirected to QuickBooks to log in if you haven't already.
Select the Connect button to authorize the connection between Taxomate and your QuickBooks account.
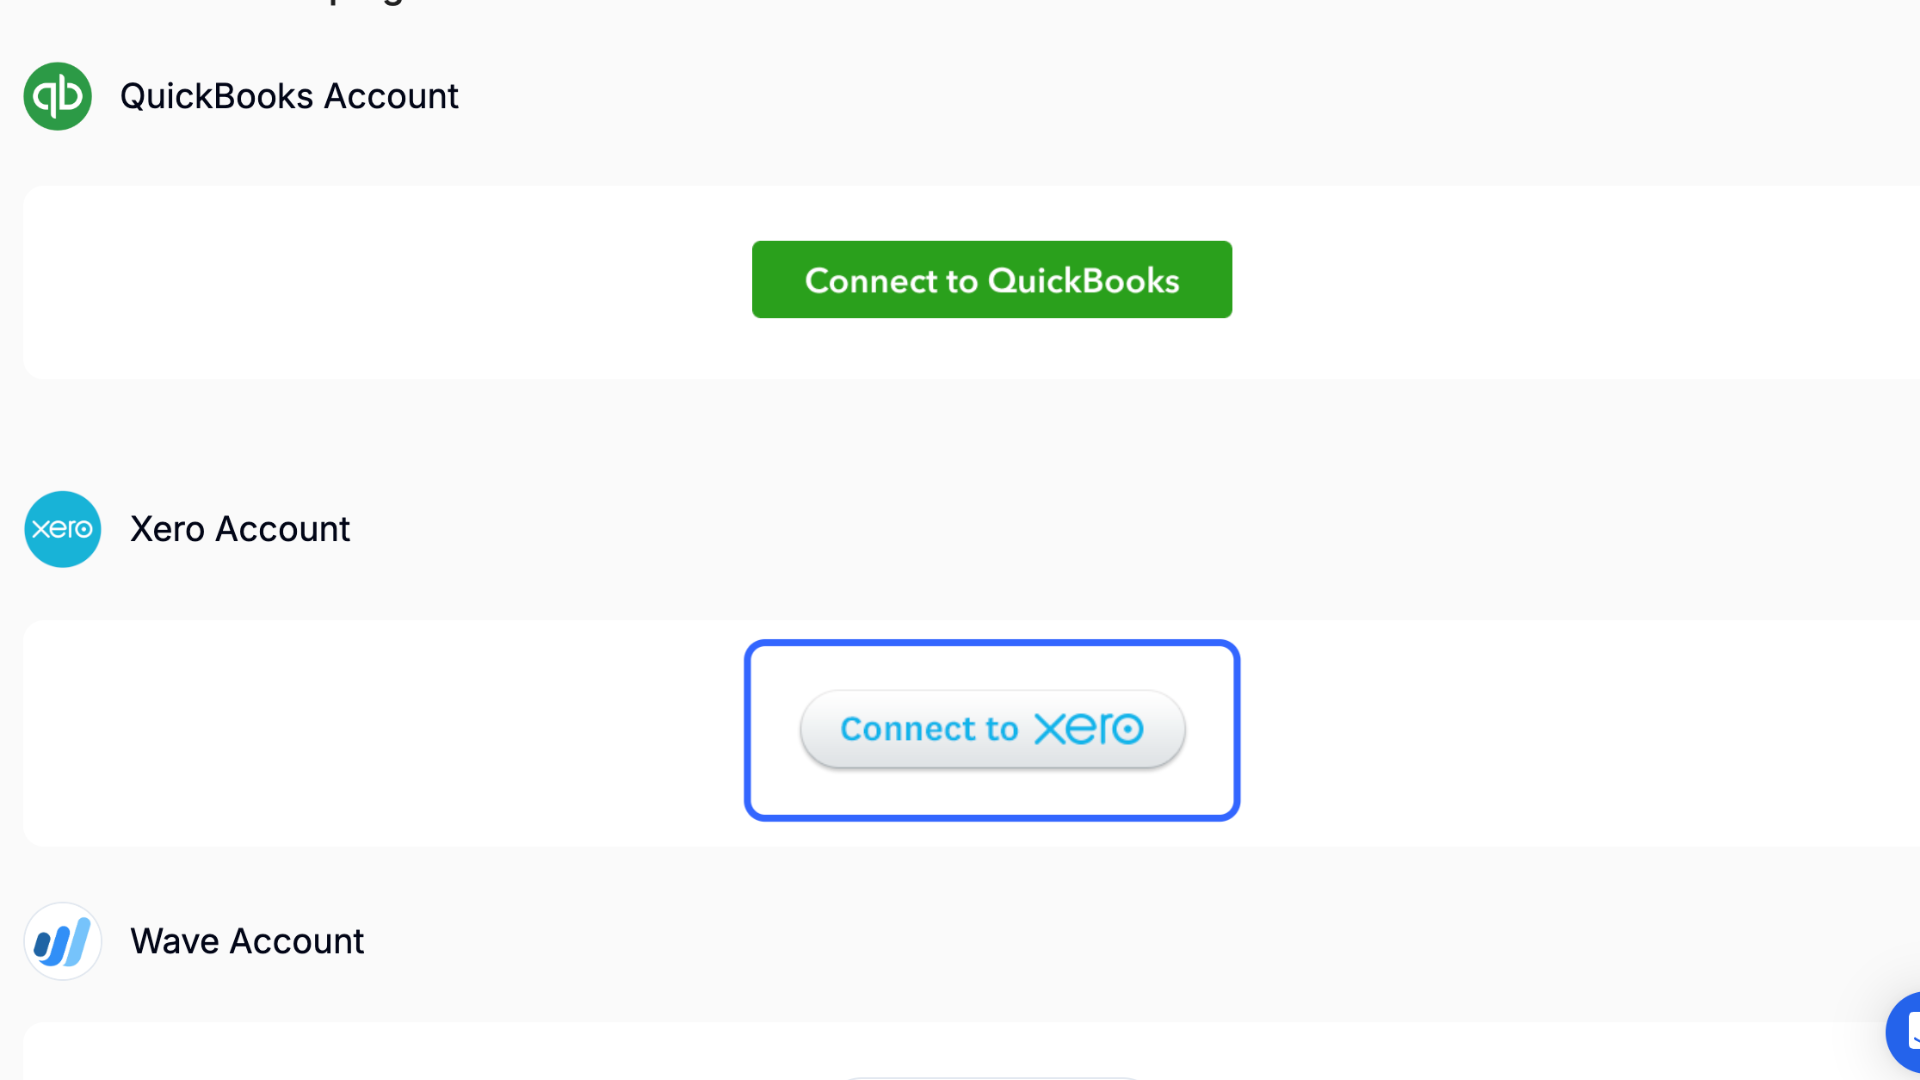
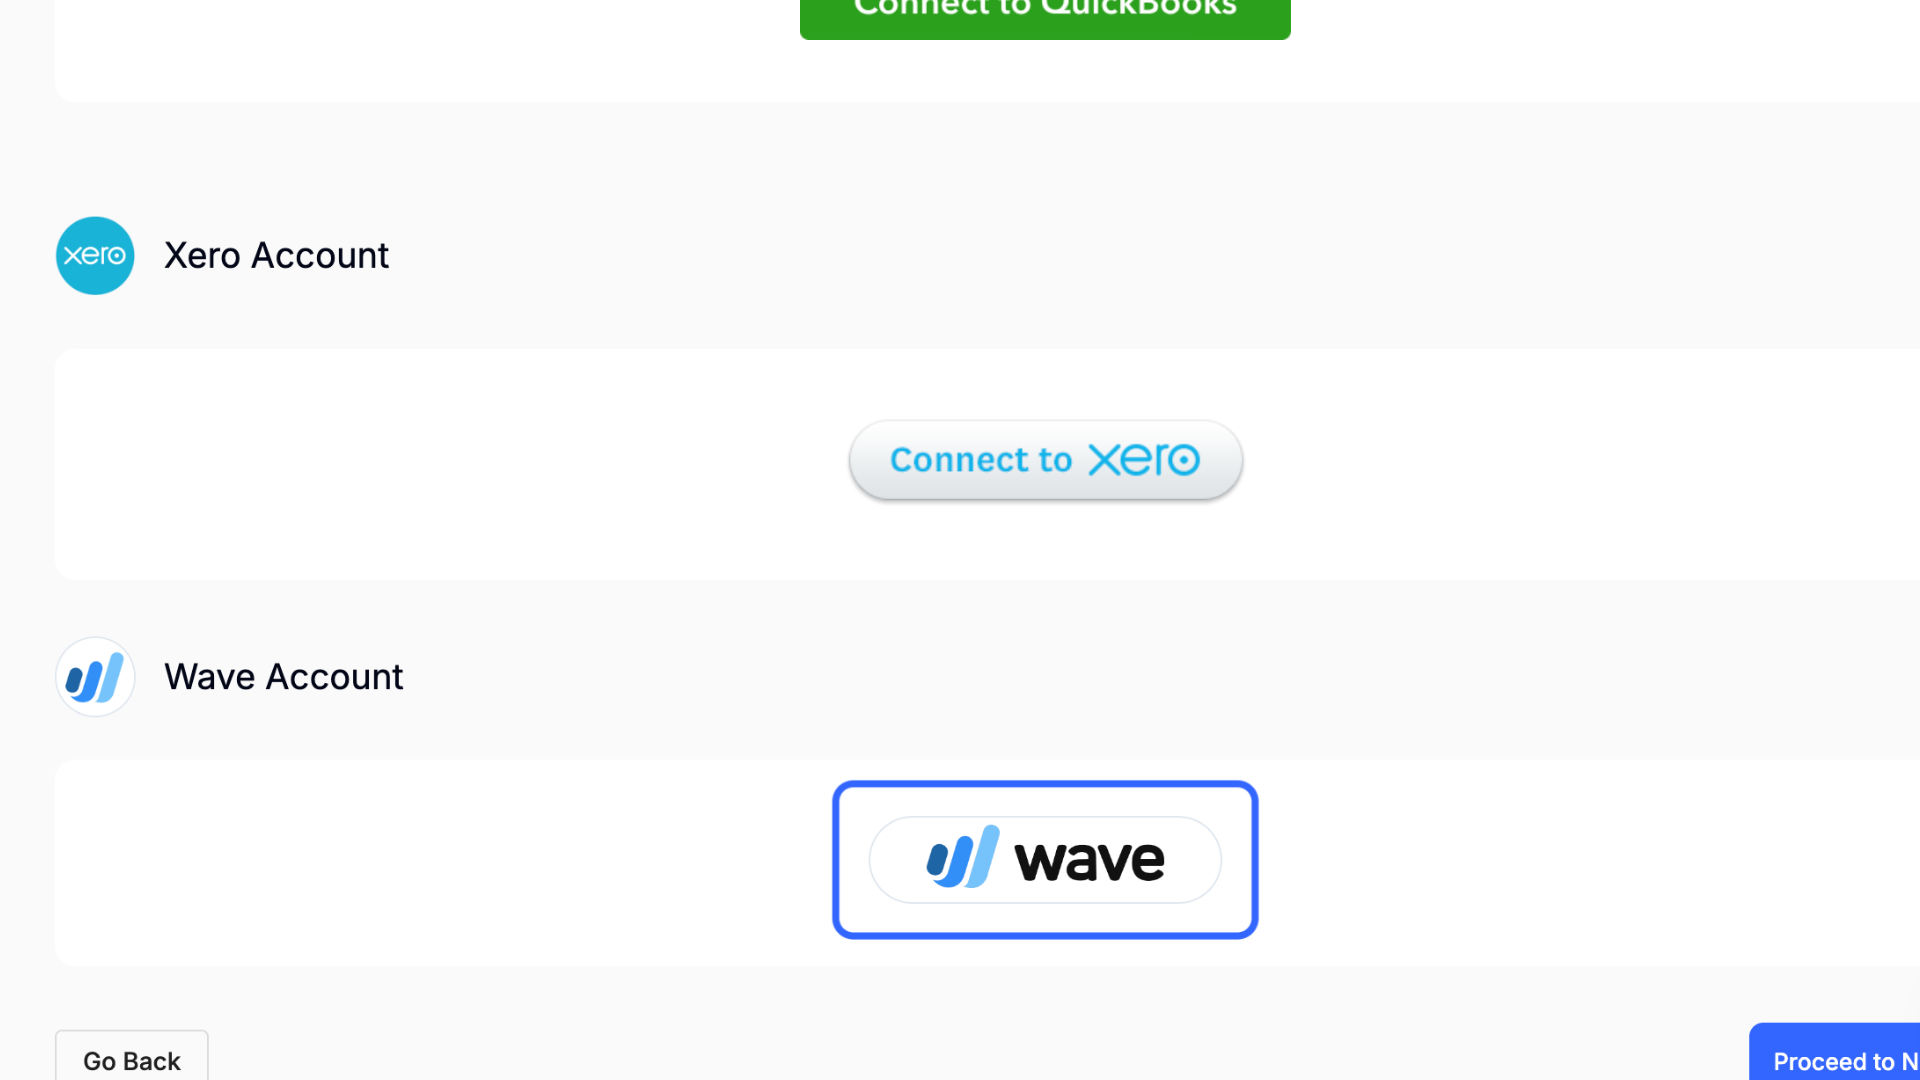
Select the Connect to Xero button. You will then be redirected to Xero to log in if you haven't already.
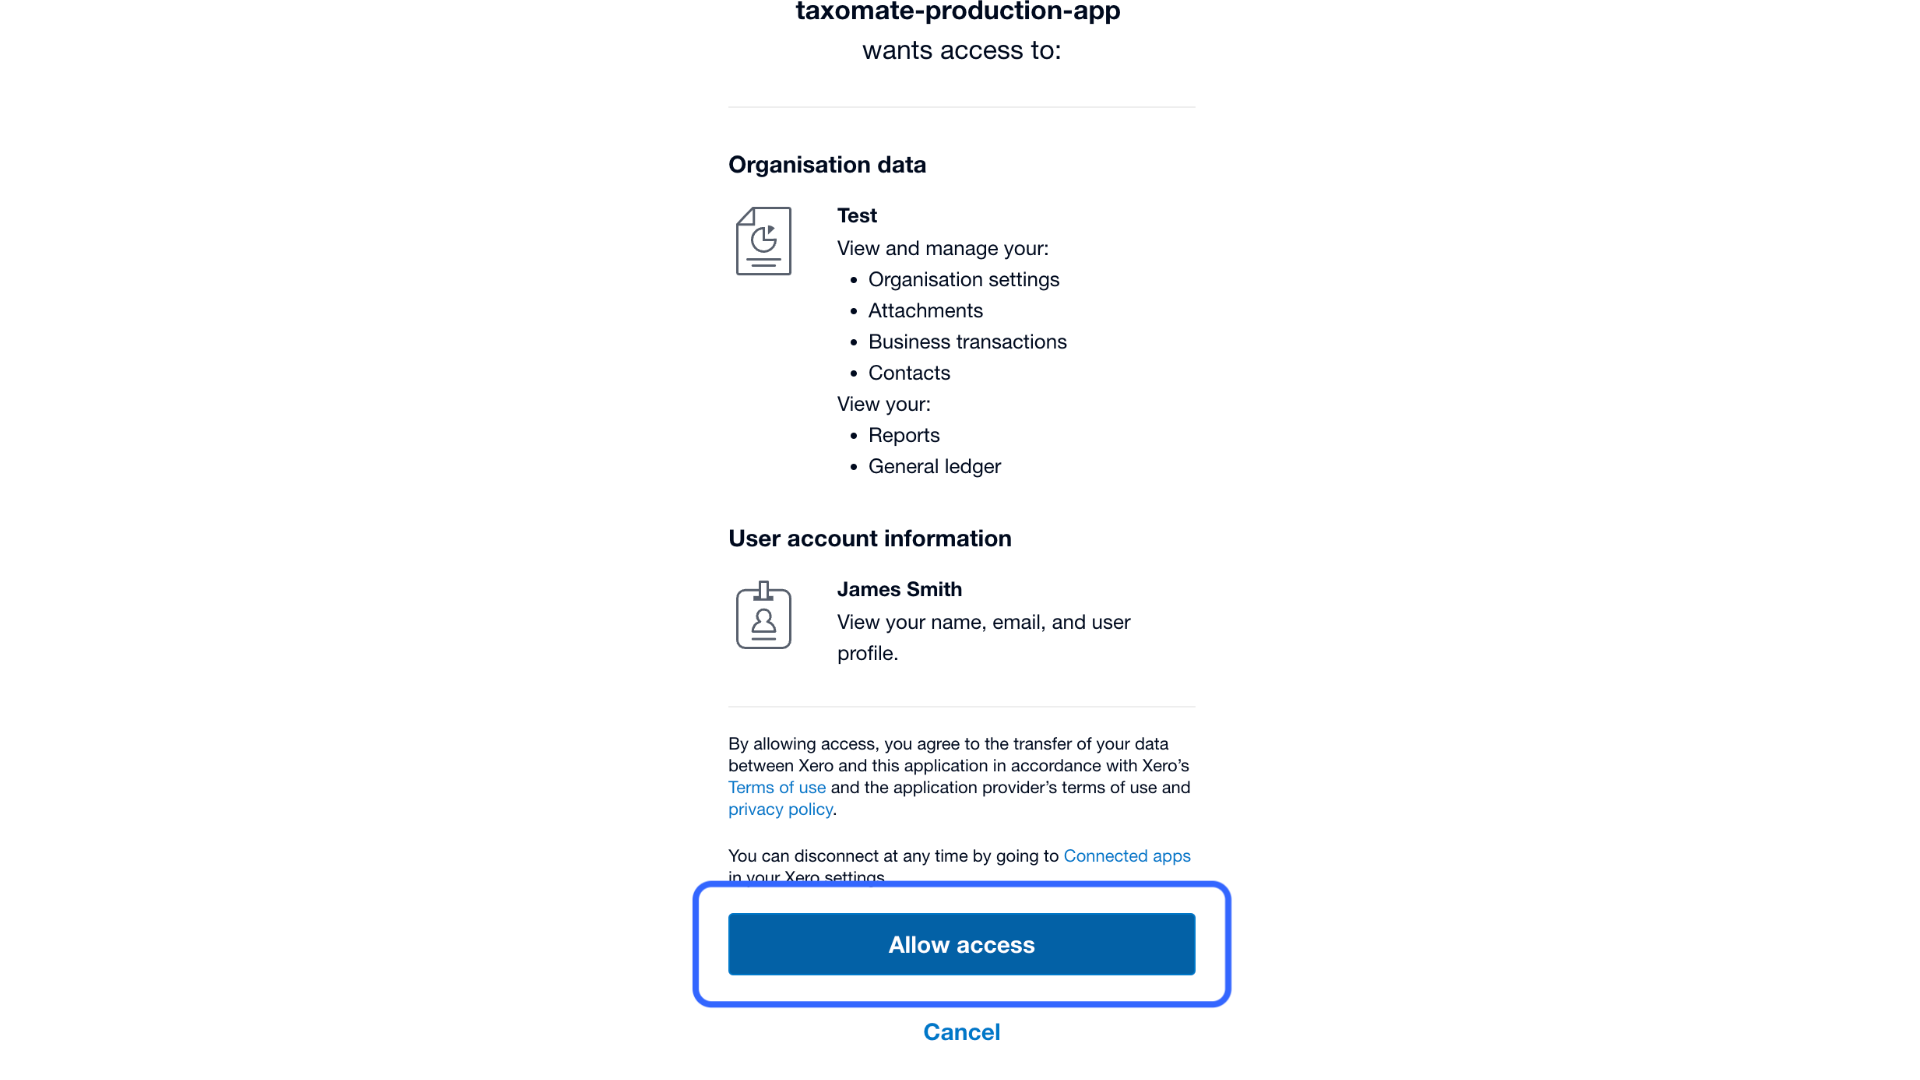
Select the Allow Access button to authorize the connection between Taxomate and your Xero account.
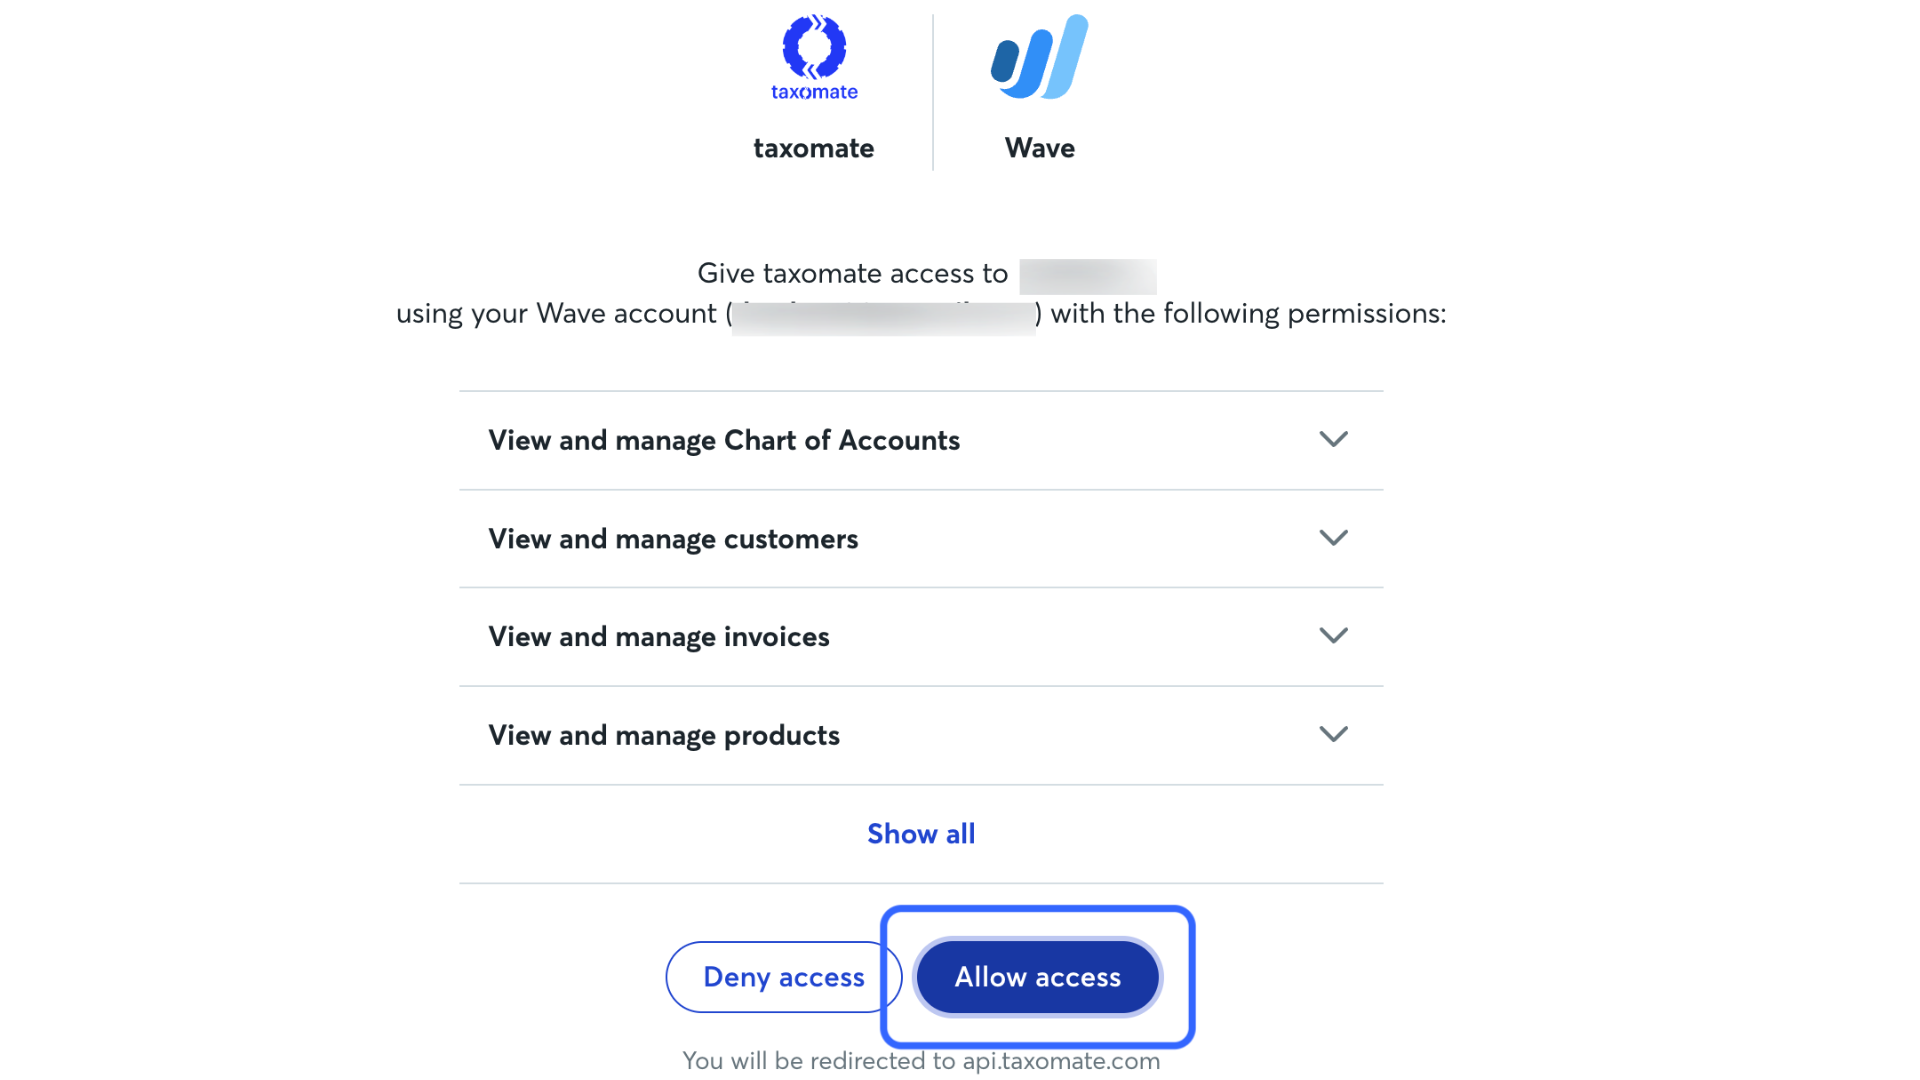
Select the Wave button. You will then be redirected to Wave to log in if you haven't already.
Select the Allow Access button to authorize the connection between Taxomate and your Wave account.